An example with step-by-step instructions on how to write a FRIDA agent in TypeScript
I make some FRIDA scripts from time to time, but it can be quite a hassle to set this up for the first time in TypeScript.
You can find the documentation around the FRIDA JS/TS API over here.
This tutorial assumes you are using Intellij IDEA (tested on 2022.1.2).
Before you get started in this tutorial you want to install NodeJS and Intellij IDEA.
For the Android specific part about this tutorial (FRIDA can target more platforms than just Android), you will need to have adb installed and added to your environment PATH.
If you look at the commit history you can see the changes that occurred upon each step to follow along.
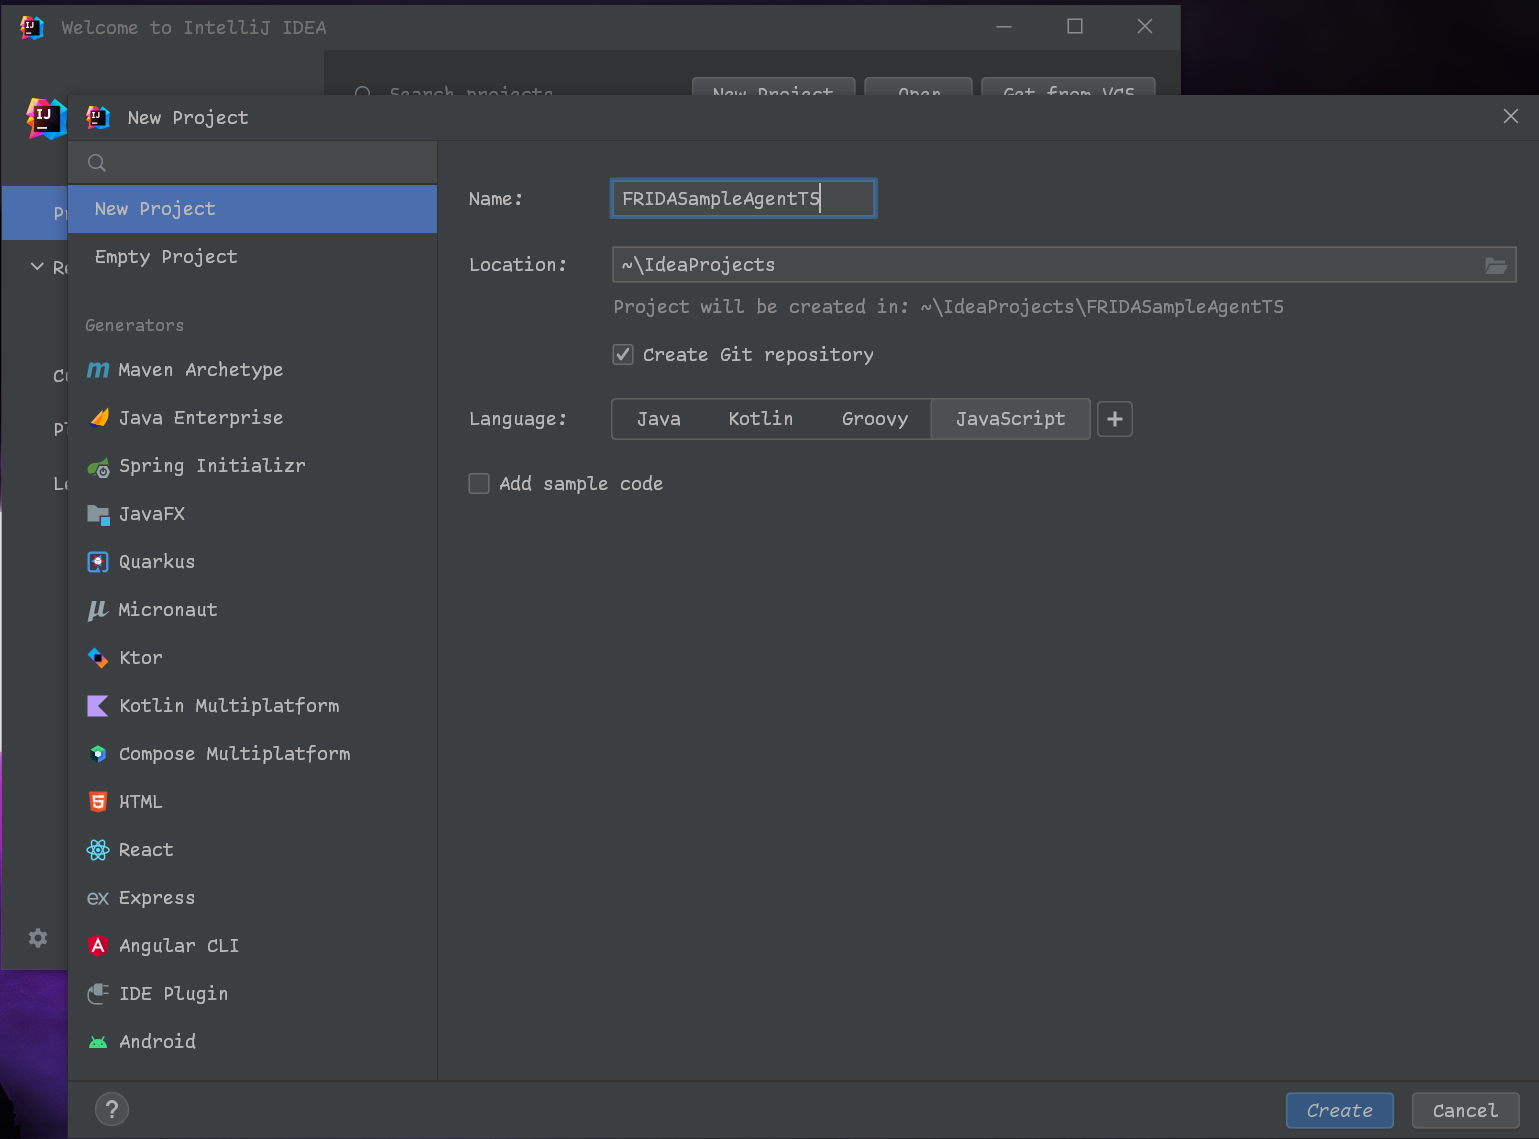
This step is pretty easy. Fire up Intellij IDEA, click on 'Create Project' and start populating the fields.
The screenshot below will show you what the settings are that I went with to get the project as it shows in the initial commit.
- Language: JavaScript
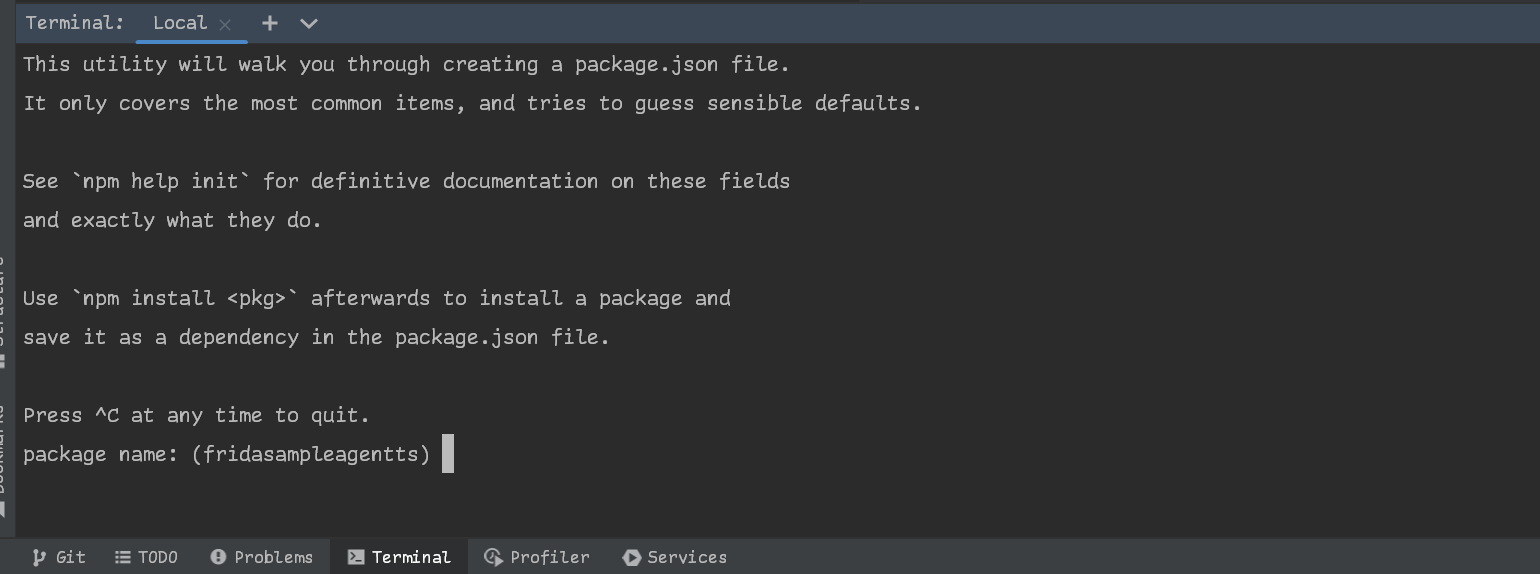
Run the following command in your terminal:
npm initIt will ask you for more information in the terminal, fill it in as needed:
Run the following command in your terminal:
npm install typescript --save-devRun the following command in your terminal:
tsc --initRun the following command in your terminal:
npm install @types/node frida-compile @types/frida-gum --save-devYou basically want your tsconfig.json to look like mine. Alternatively there is a more compact way of achieving the same thing, just copy-paste the following:
{
  "compilerOptions": {
    "target": "es2020",
    "lib": ["es2020"],
    "allowJs": true,
    "noEmit": true,
    "strict": true,
    "esModuleInterop": true
  }
}You want to create a directory called src and inside you want to create a file called index.ts.
This is the entrypoint of your FRIDA agent.
After creating the file you want to make sure that you point NodeJS to it, otherwise nothing will get compiled.
In package.json change "main": "index.js", to "main": "src/index.ts",.
Next you want to add the following actions.
In package.json change:
"scripts": {
    "test": "echo \"Error: no test specified\" && exit 1"
  },
to
"scripts": {
    "prepare": "npm run build",
    "build": "frida-compile src/index.ts -o index.js -c",
    "watch": "frida-compile src/index.ts -o index.js -w"
  },
You want to finish it off by creating a .gitignore in the root directory of your project with at least the following content:
/index.js
/node_modules
This will prevent the vendor directory (the directory with all the dependencies) and the compiled code from being uploaded to GitHub.
Next you add some code into the index.ts, I suggest starting off with something similar to this:
// Startup
const version = "v1.0.0"
console.log(`Launching script ${version} on FRIDA ${Frida.version}`)

// Check your environment is ready
if(Java.available){
    setTimeout(function (){
        // Execute FRIDA code here
        Java.perform(function (){
            // FRIDA code here
        });
    }, 0);
}
The key takeaways from the snippet above should be:
- We check if a java environment is available in our target using
Java.available(because I am targeting Android in this example) - We use
setTimeoutto embed our code. - We use
Java.performto actually execute our code. (because I am targeting Android in this example)
If you were to run the code inside this repository you would have to clone the repository and start from this step.
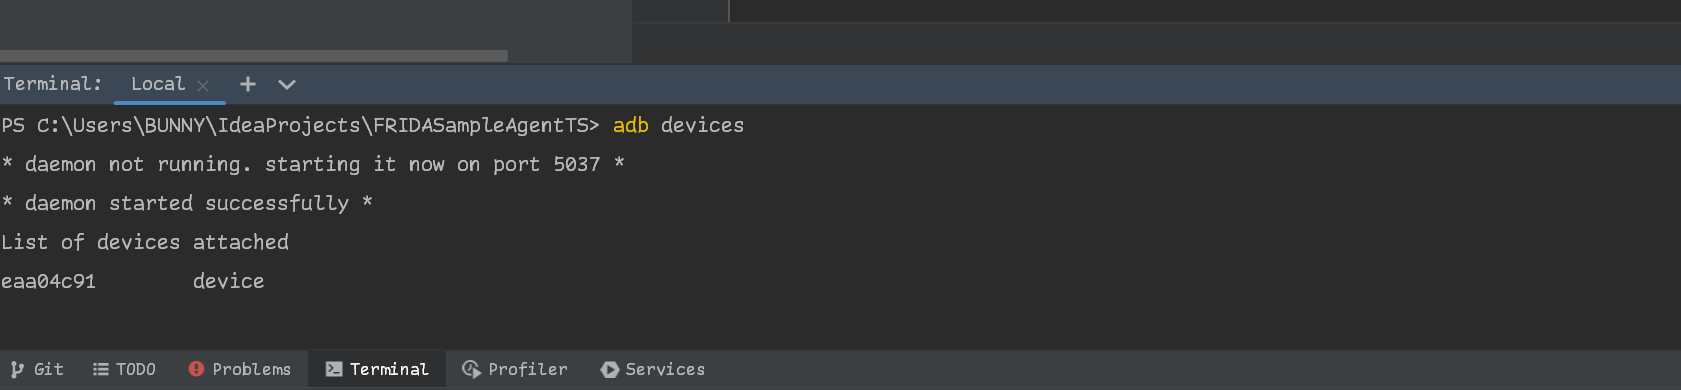
Run the following command in your terminal:
npm installRun the following command in your terminal:
adb devicesIf it says unauthorized you will need to authorize the ADB connection on the phone/emulator.
It should look like this:
Run the following command in your terminal:
npm run prepareThis should create a file called index.js in the root directory of your project.
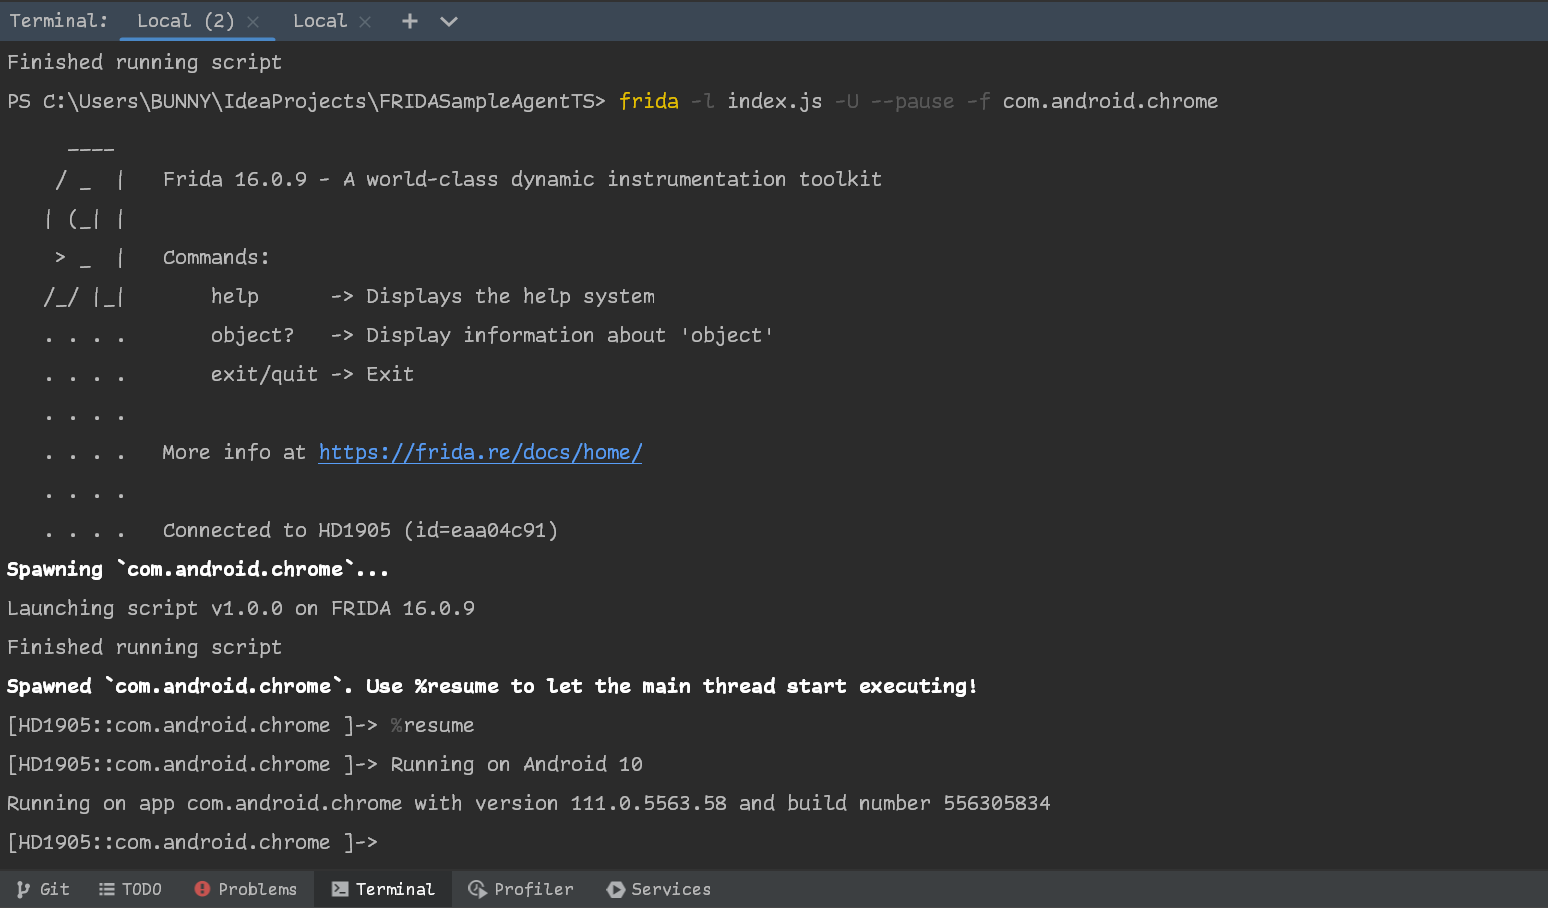
Run the following command in your terminal:
frida -l index.js -U --pause -f com.android.chromeOnce it loads it will tell you to resume the application
Run the following command in your terminal:
%resumeFinally, you should be left with a terminal that looks like this: