
Robotics final project
- Step 1: Make sure the robotic arm and the gaming controller are attached to an immobile surface.
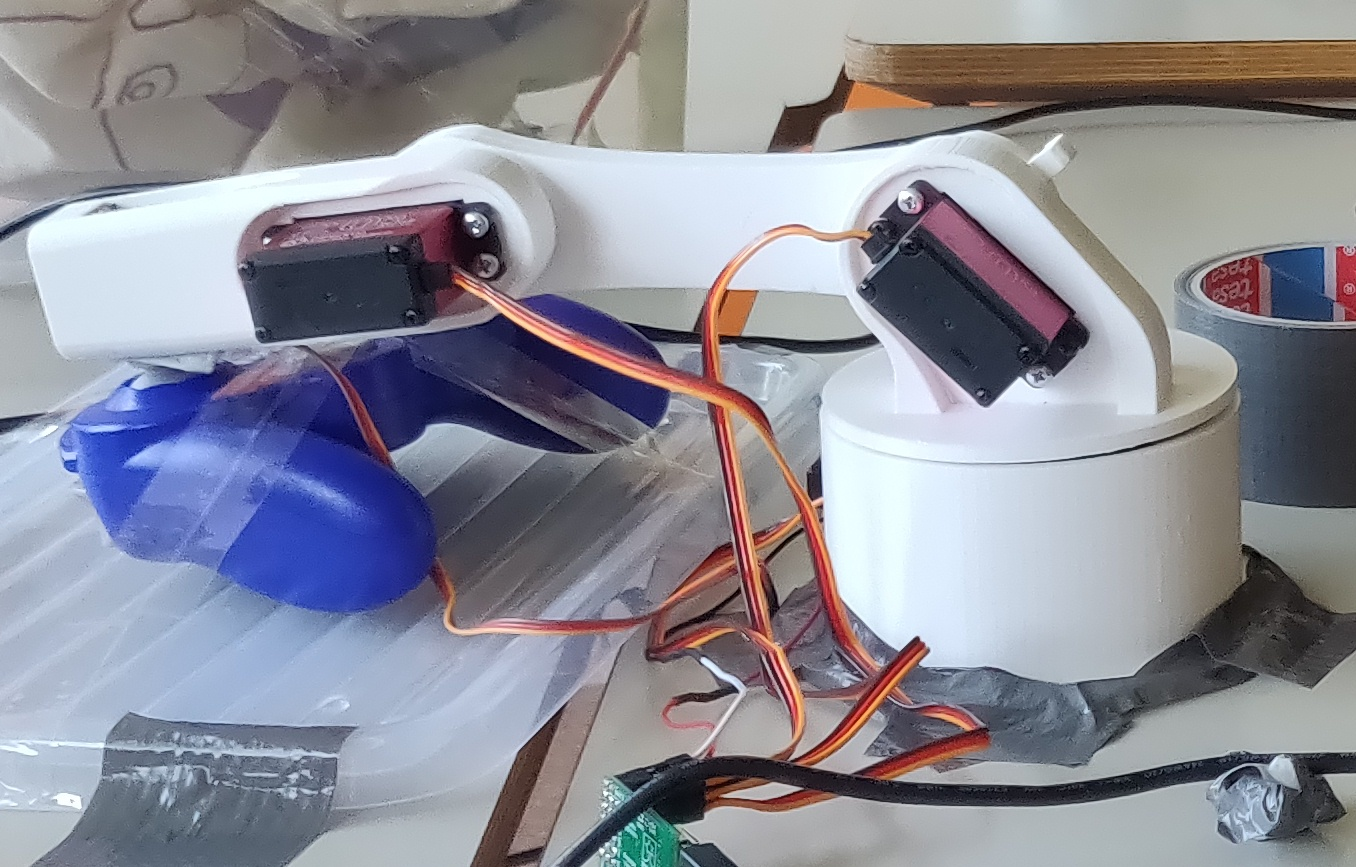
- Step 2: Position the robotic arm so that the tip of the arm rests on the analog stick of the gaming controller.
- Step 3: Fix the tip of the robotic arm to the analog stick, so that the tip does not slip away from the analog stick during heavy movement.
Duct tape was used in our setup to attach the arm and the controller to a surface and to fix the tip of the robotic arm to the analog stick.
The setup should be similar to the setup seen in the following image:

* Step 4: Connect the servos of the robotic arm to the Maestro Servo Controller.
* Step 5: Connect the Maestro Servo Controller to the device that is responsible for running the Pololu interface.
- Step 1: Start the Maestro Control Center program.
- Step 2: Make sure the robotic arm is connected properly by moving the status of the servos in the control center.
- Step 3: Under the script tab of the control center, paste the script in the "kinetics" file.
- Step 4: Run the Atari Breakout environment with the following command: "python .\dqn.py test"