Tienda e-commerce de toallas y textiles personalizados construida con Astro 5, Shopify Storefront API, Appwrite, Transbank y PayPal. Incluye panel de administración, gestión de órdenes, emails transaccionales vía Resend y pipeline de CI/CD.


- 🌐 Productos dinámicos vía Shopify Storefront API (GraphQL)
- 💳 Pagos con Transbank (Webpay Plus) y PayPal (capture/authorize)
- 🔐 Autenticación de usuario con Appwrite
- 🛒 Carrito de compras con edición en tiempo real
- 📦 Panel de administración con gestión de órdenes e inventario
- 📧 Emails transaccionales con Resend
- 🧩 Sugerencias de productos similares
- 🔍 Búsqueda, ordenación y filtros avanzados
- 🏷️ Tags, categorías, proveedores, rango de precio y variantes
- 🖼️ Zoom, hover y slider de imágenes de producto
- 📱 Totalmente responsive
- 🔄 Home Banner Slider dinámico
- 📝 Contenido en Markdown / MDX
- 🧪 Tests unitarios con Vitest
- 🛡️ CI/CD con GitHub Actions (lint + tests + validación de checkout)
- 🔍 SEO optimizado (sitemap + robots.txt)
- 🤖 Agente operacional con catálogo de Super-Skills documentado
La documentación está organizada en docs/:
| Documento | Contenido |
|---|---|
| docs/technical/README.md | Índice técnico — punto de entrada |
| docs/technical/agents.md | Agente operacional único (toallaalacarta-ops), alcance, secrets y runbooks |
| docs/technical/skills.md | Catálogo de Super-Skills paramétricas |
| docs/technical/secrets-mapping.md | Variables de entorno por proveedor |
| docs/technical/APPWRITE_SETUP.md | Guía de configuración de Appwrite |
| docs/technical/RESEND_SETUP.md | Configuración de emails transaccionales |
| docs/history/ | Bitácora de refactorizaciones e hitos |
| docs/planning/ | Roadmap y tareas pendientes |
El proyecto sigue una estructura modular y orientada a dominio:
src/
├── infrastructure/        # Clientes externos canónicos (Appwrite Singleton, config)
├── modules/orders/        # Lógica de negocio por dominio (OrderService, tipos)
├── lib/                   # Utilidades compartidas (validación, pagos, email, Shopify)
│   ├── utils/             # Helpers de contenido y carrito (Super-Skills)
│   └── shopify/           # Cliente GraphQL + queries/mutations/fragments
├── layouts/               # Componentes Astro y React (UI, admin, cart)
├── pages/api/             # Capa HTTP — delega a services/lib
├── pages/                 # Rutas Astro
├── styles/                # CSS global y tokens de diseño
└── types/                 # Definiciones TypeScript por colección
Principio de diseño: un único agente operacional (toallaalacarta-ops) gestiona CI/CD mediante Super-Skills paramétricas. Ver docs/technical/agents.md.
- 🏠 Homepage
- 👤 About
- 📞 Contact
- 🛍️ Products
- 📦 Product Single
- 💡 Terms of services
- 📄 Privacy Policy
- 🔐 Login
- 🔑 Register
- 🚫 Custom 404
- shopify
- astro 5.15+
- node v22.20+
- npm v10.2+
- tailwind v4.1+
-
To get the tokens needed, create a Shopify partner account.

-
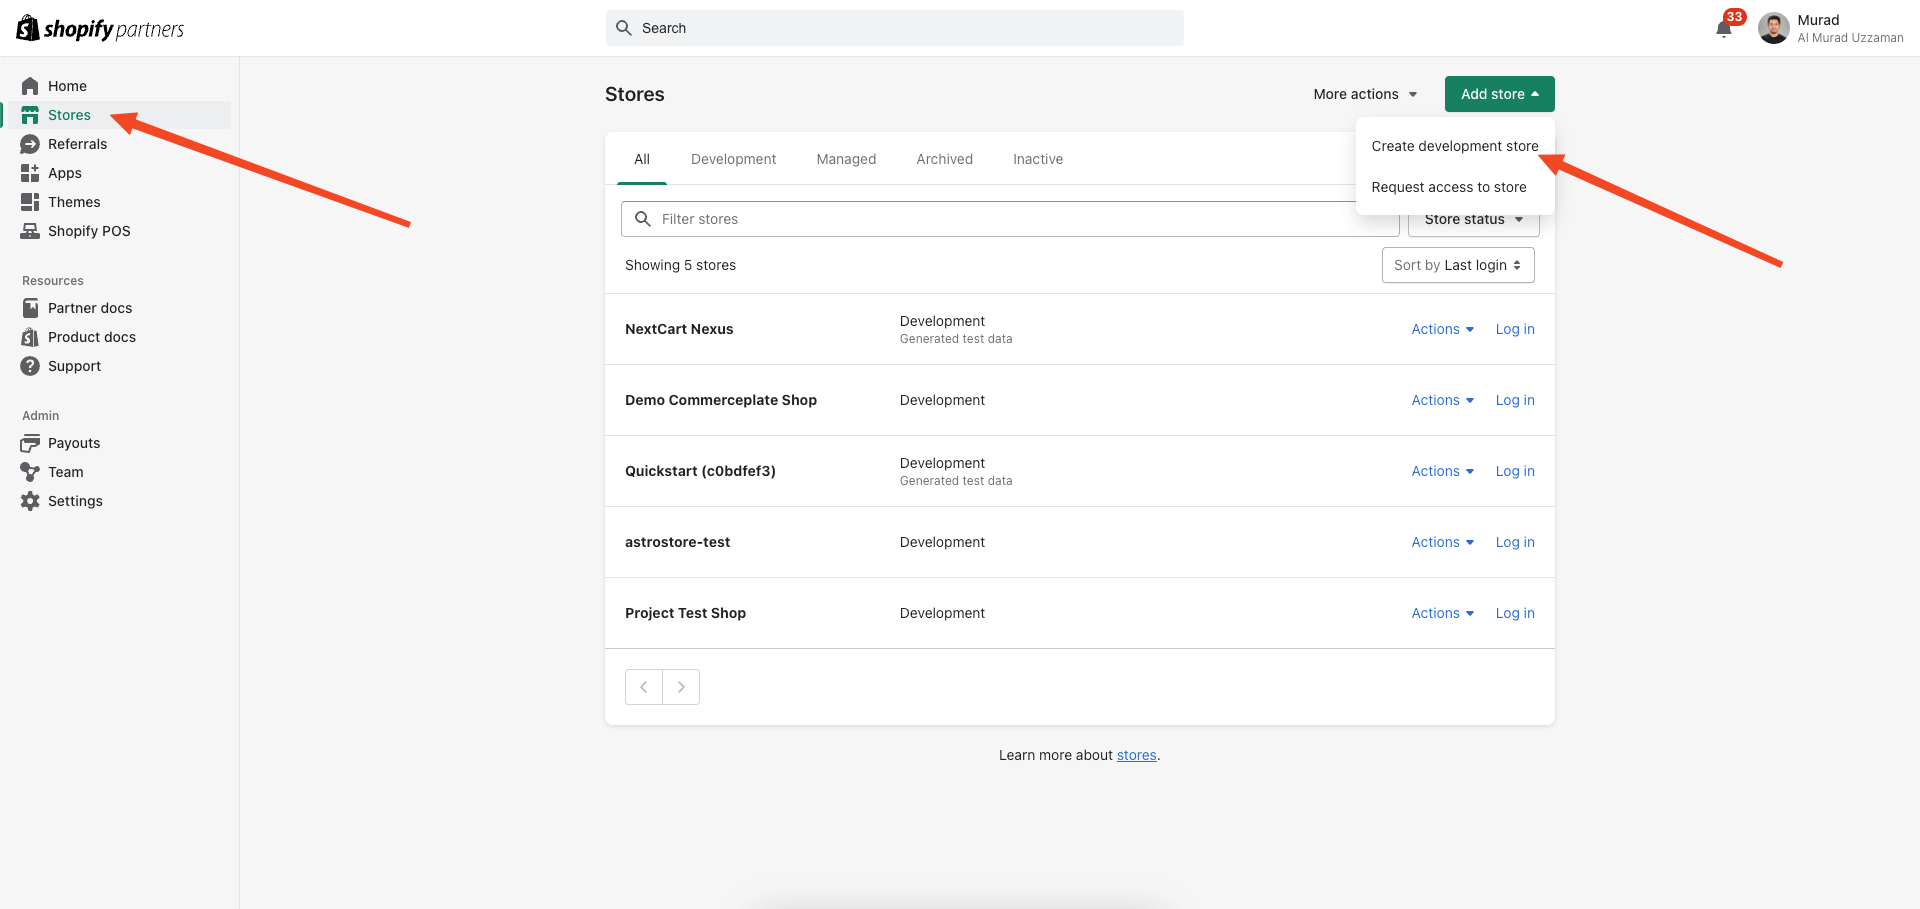
Now go to 'Stores' and select 'Add store.' Create a development store using the option 'Create development store'.
-
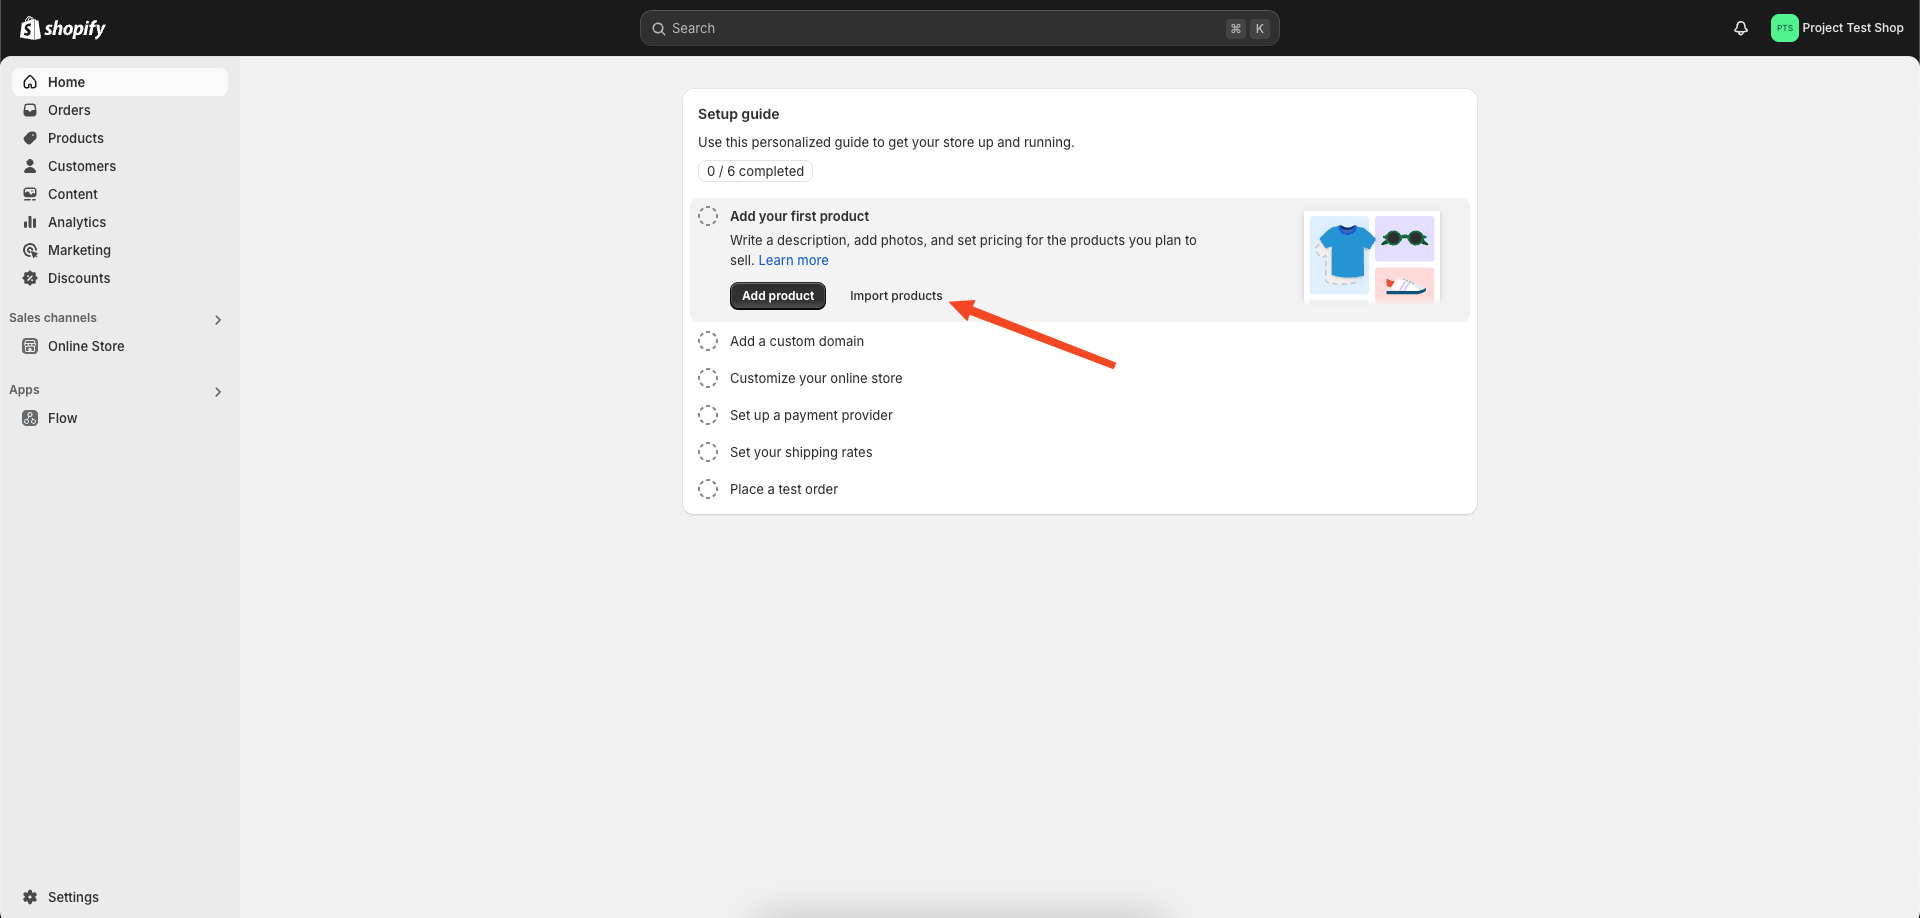
Click on import products.
-
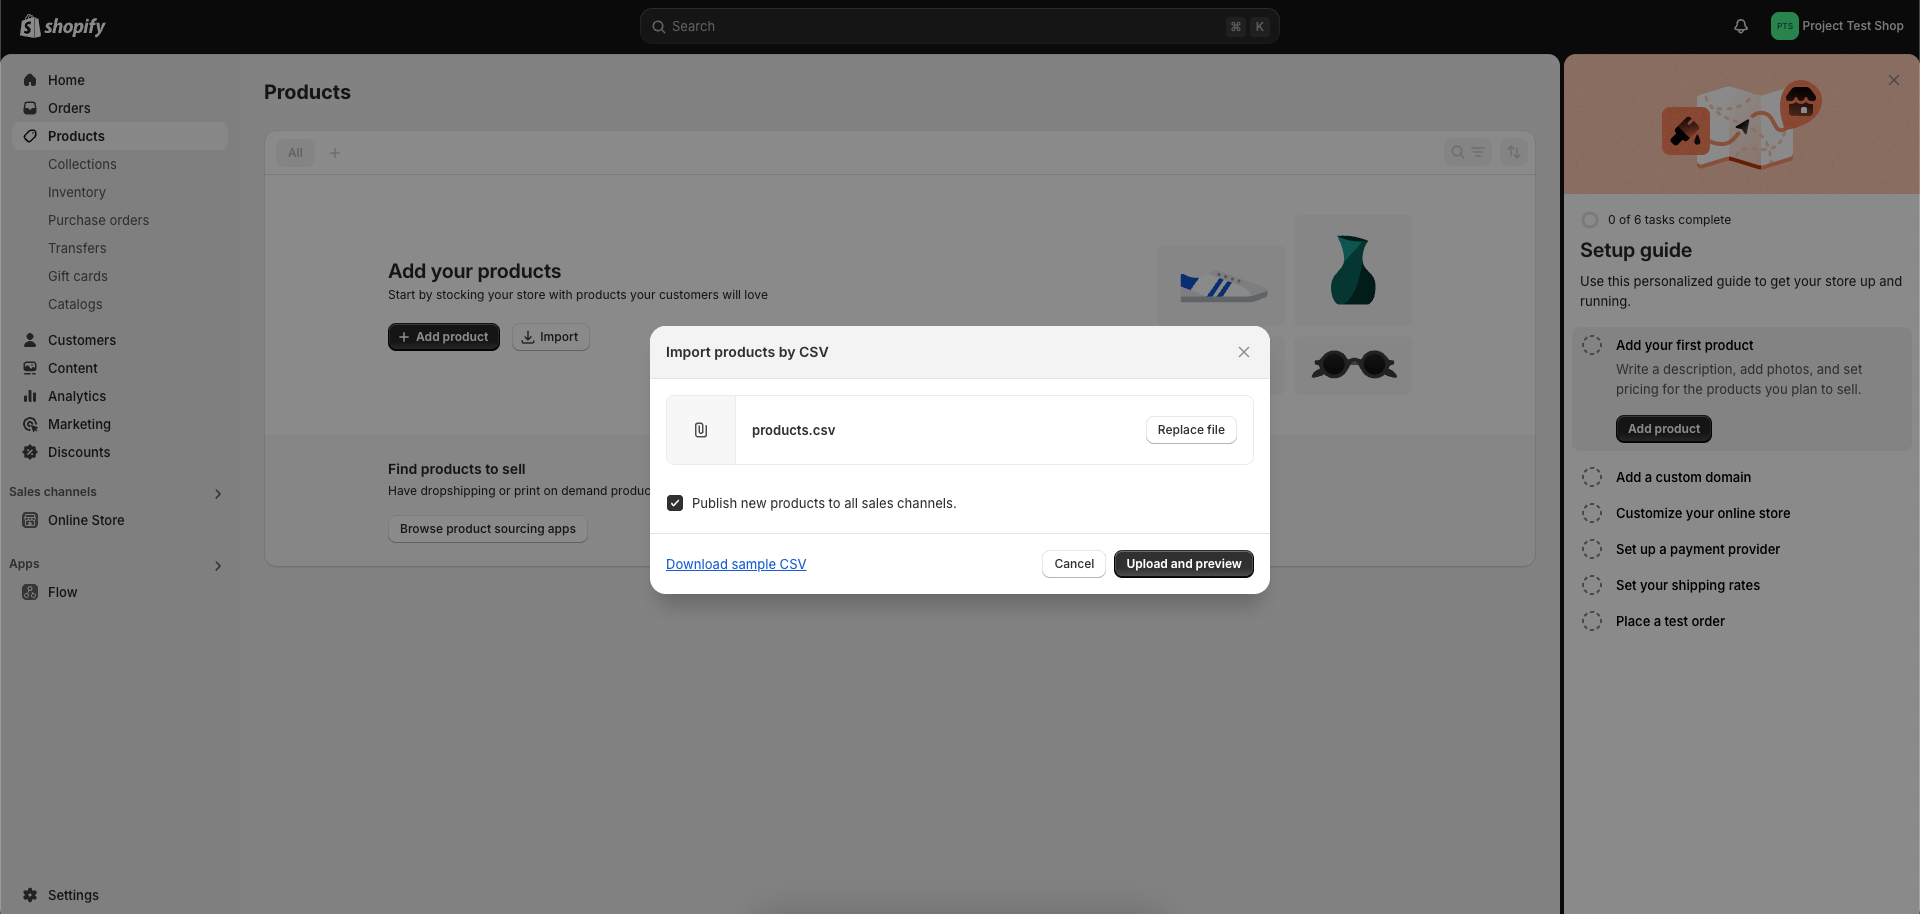
Locate the 'products' CSV file in the public folder of the repository and upload it for demo products.
-
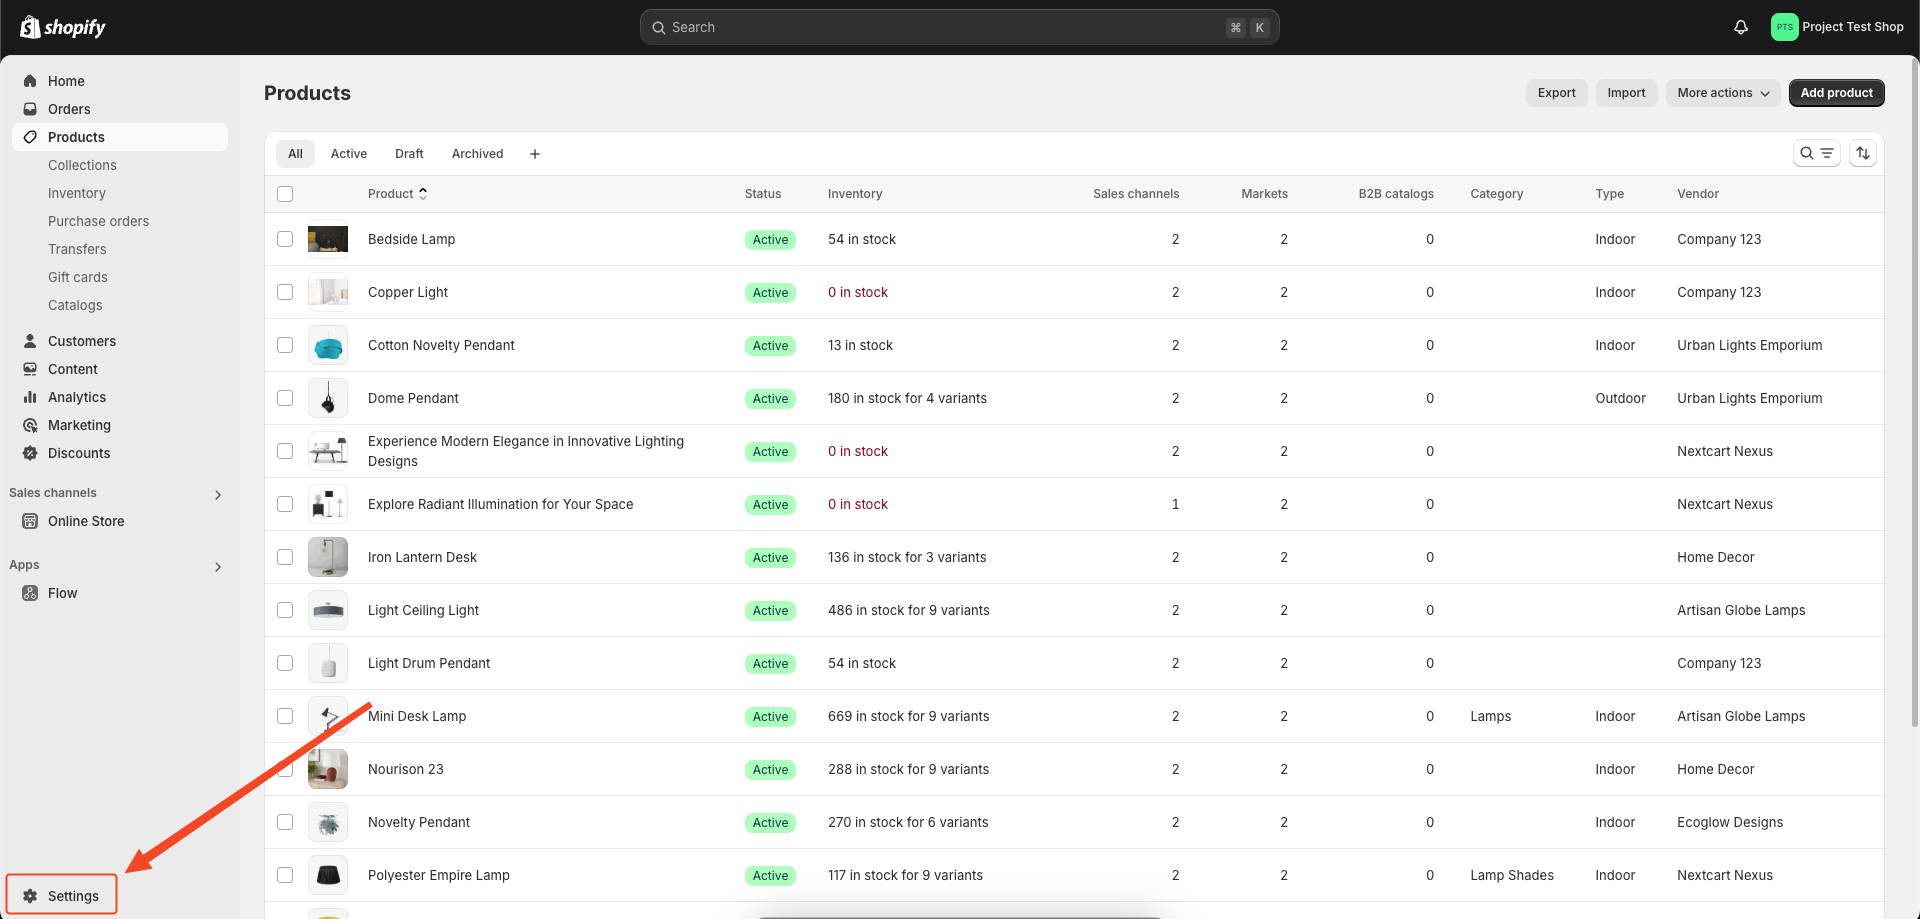
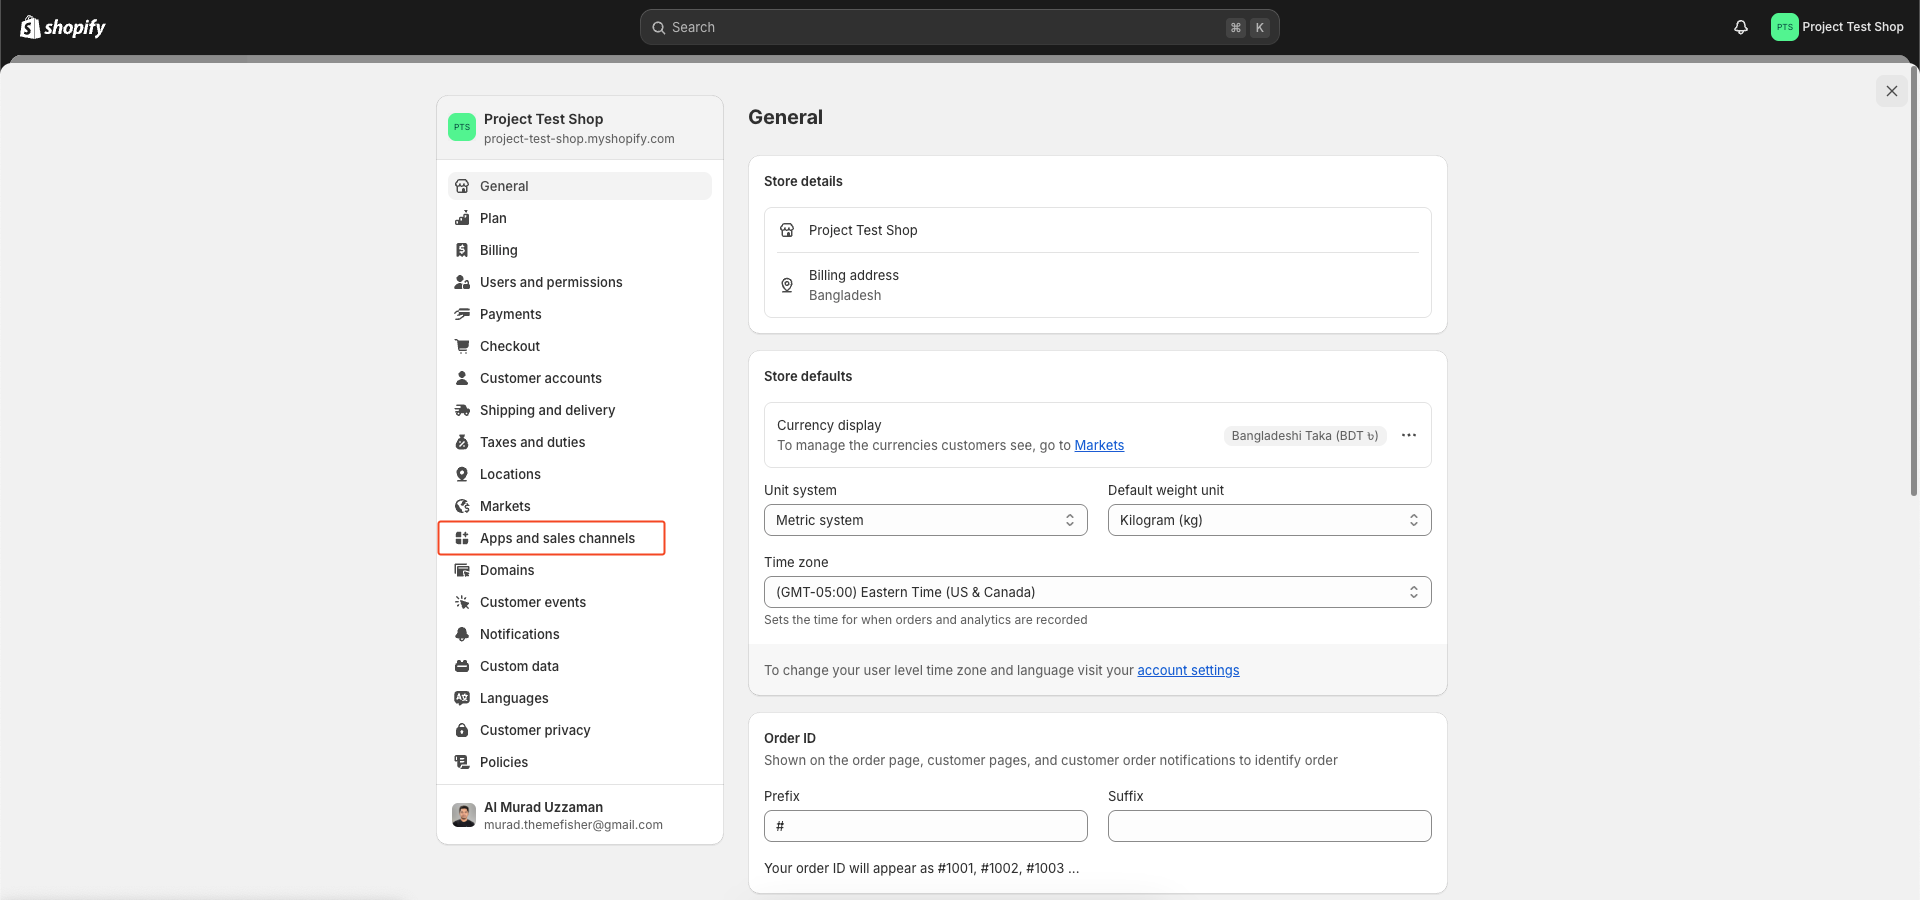
On the admin dashboard, click on ‘Settings’ at the bottom of the left sidebar.
-
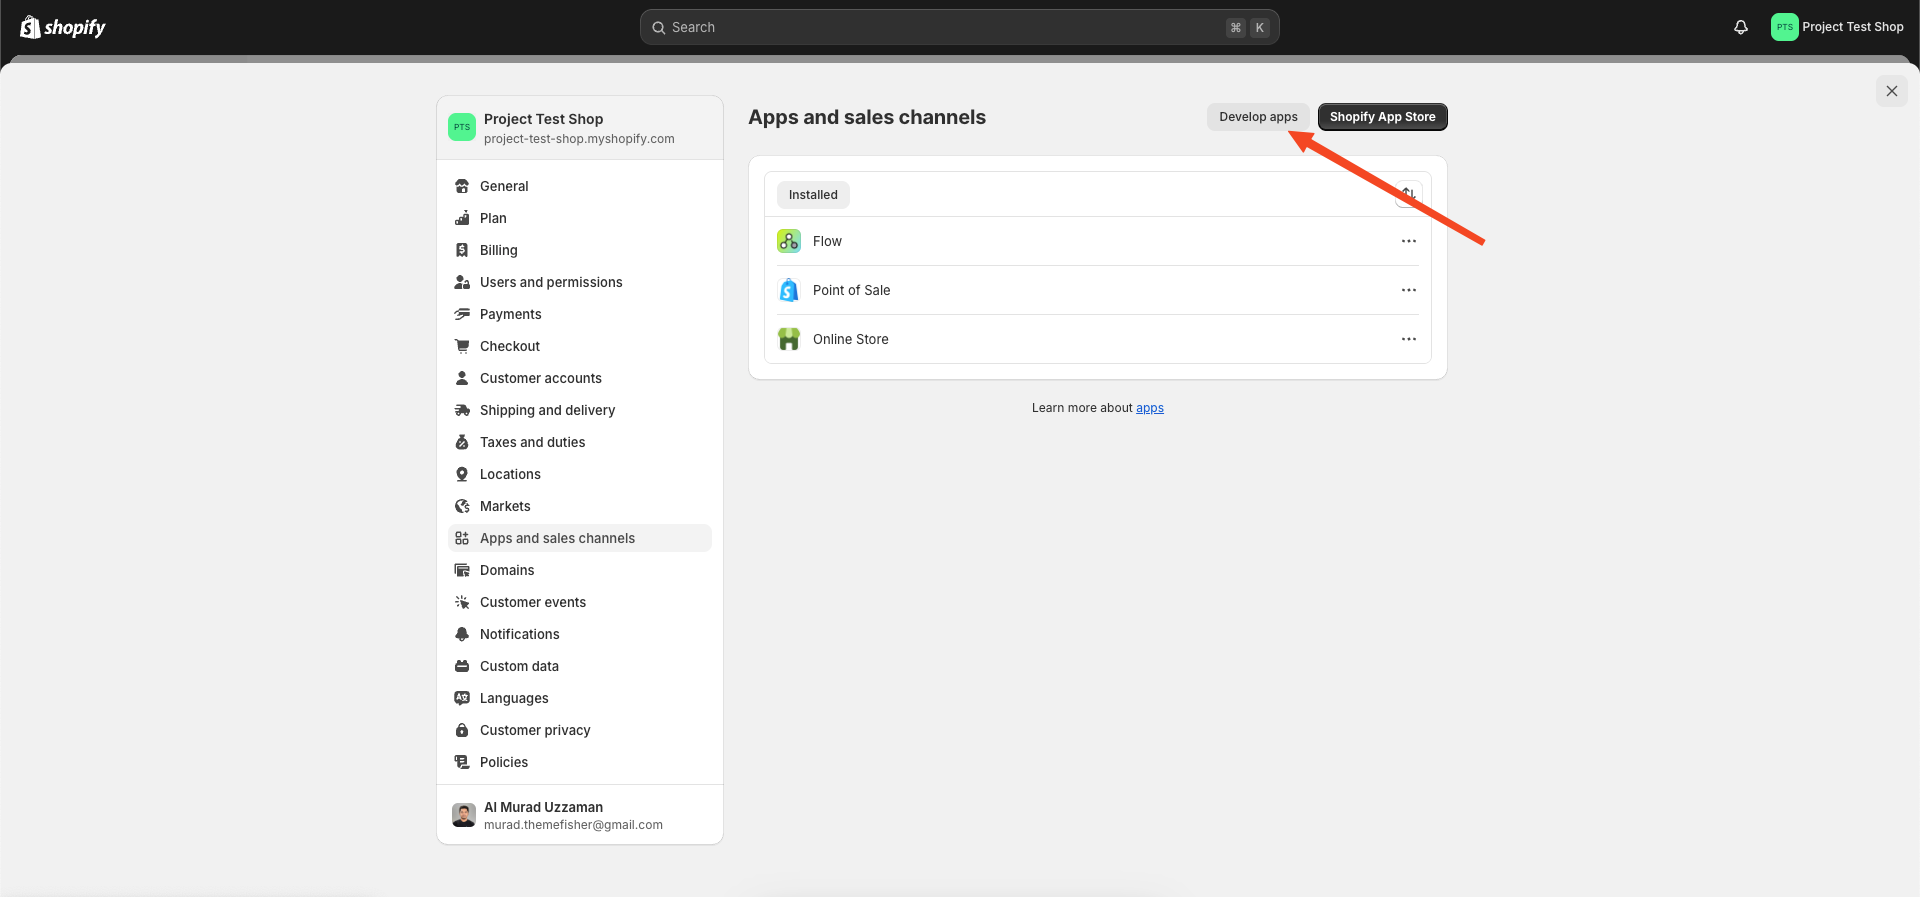
On the Settings page, click on ‘Apps and sales channels’ on the left sidebar.
-
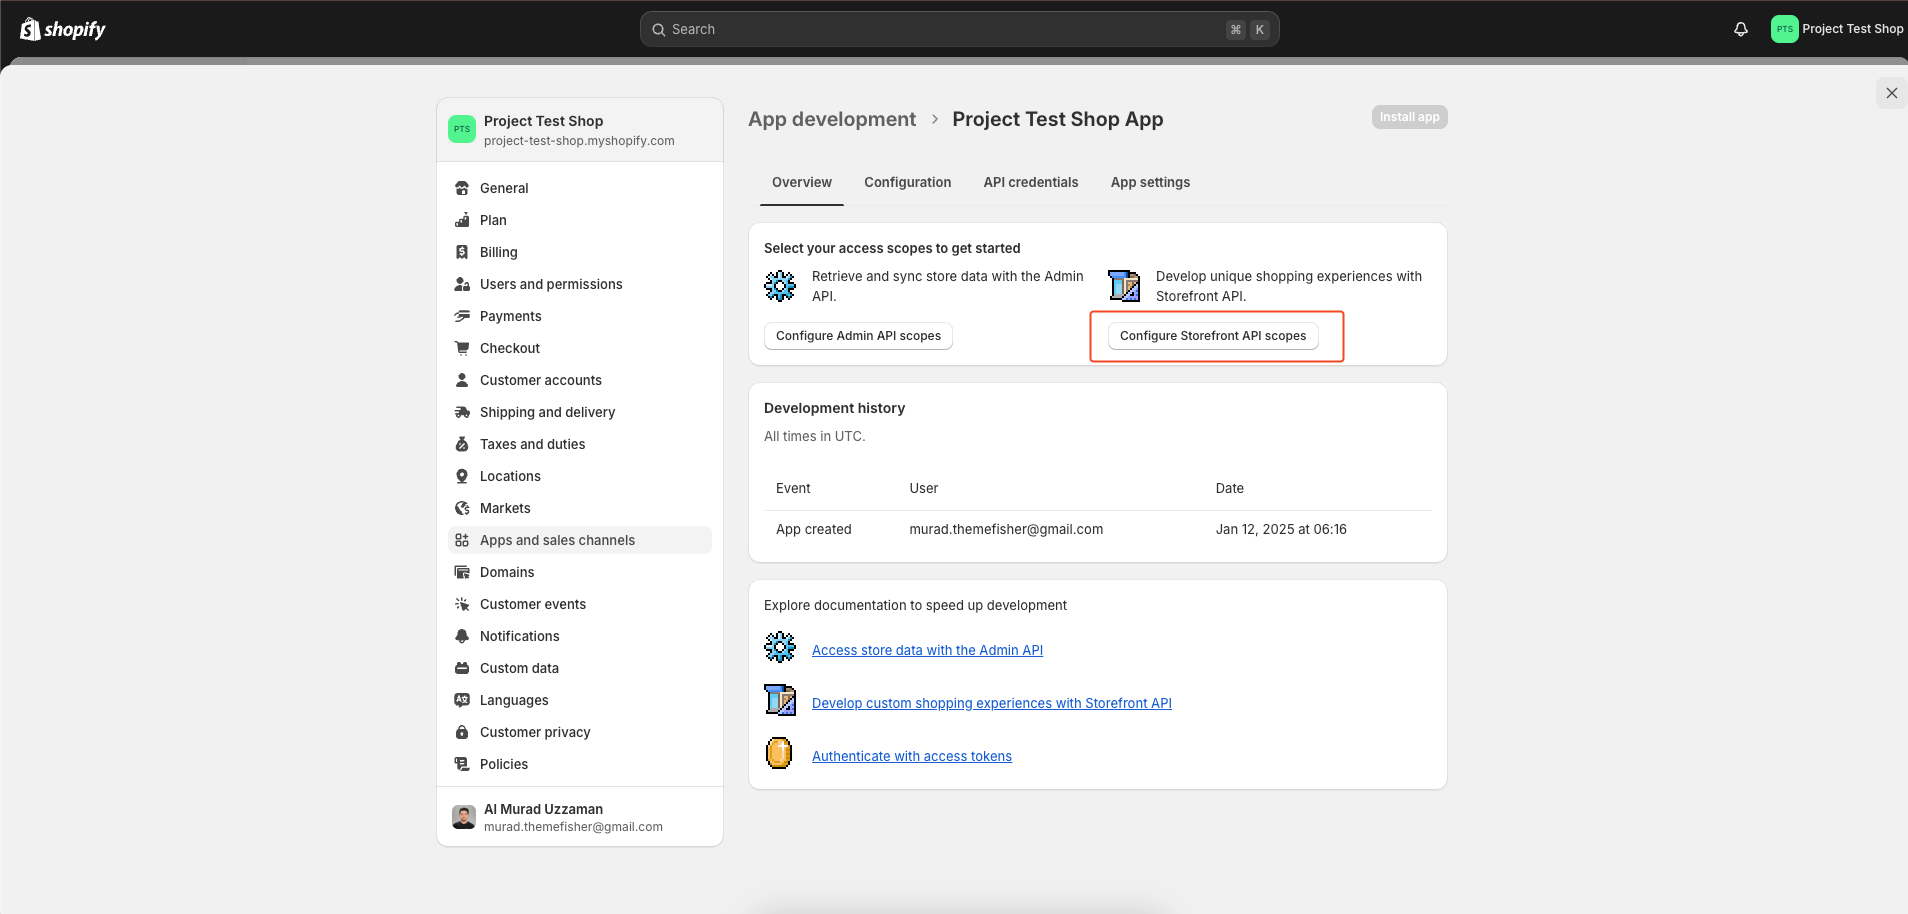
In the Apps and sales channels page that opens, click on ‘Develop apps’ on the top right.
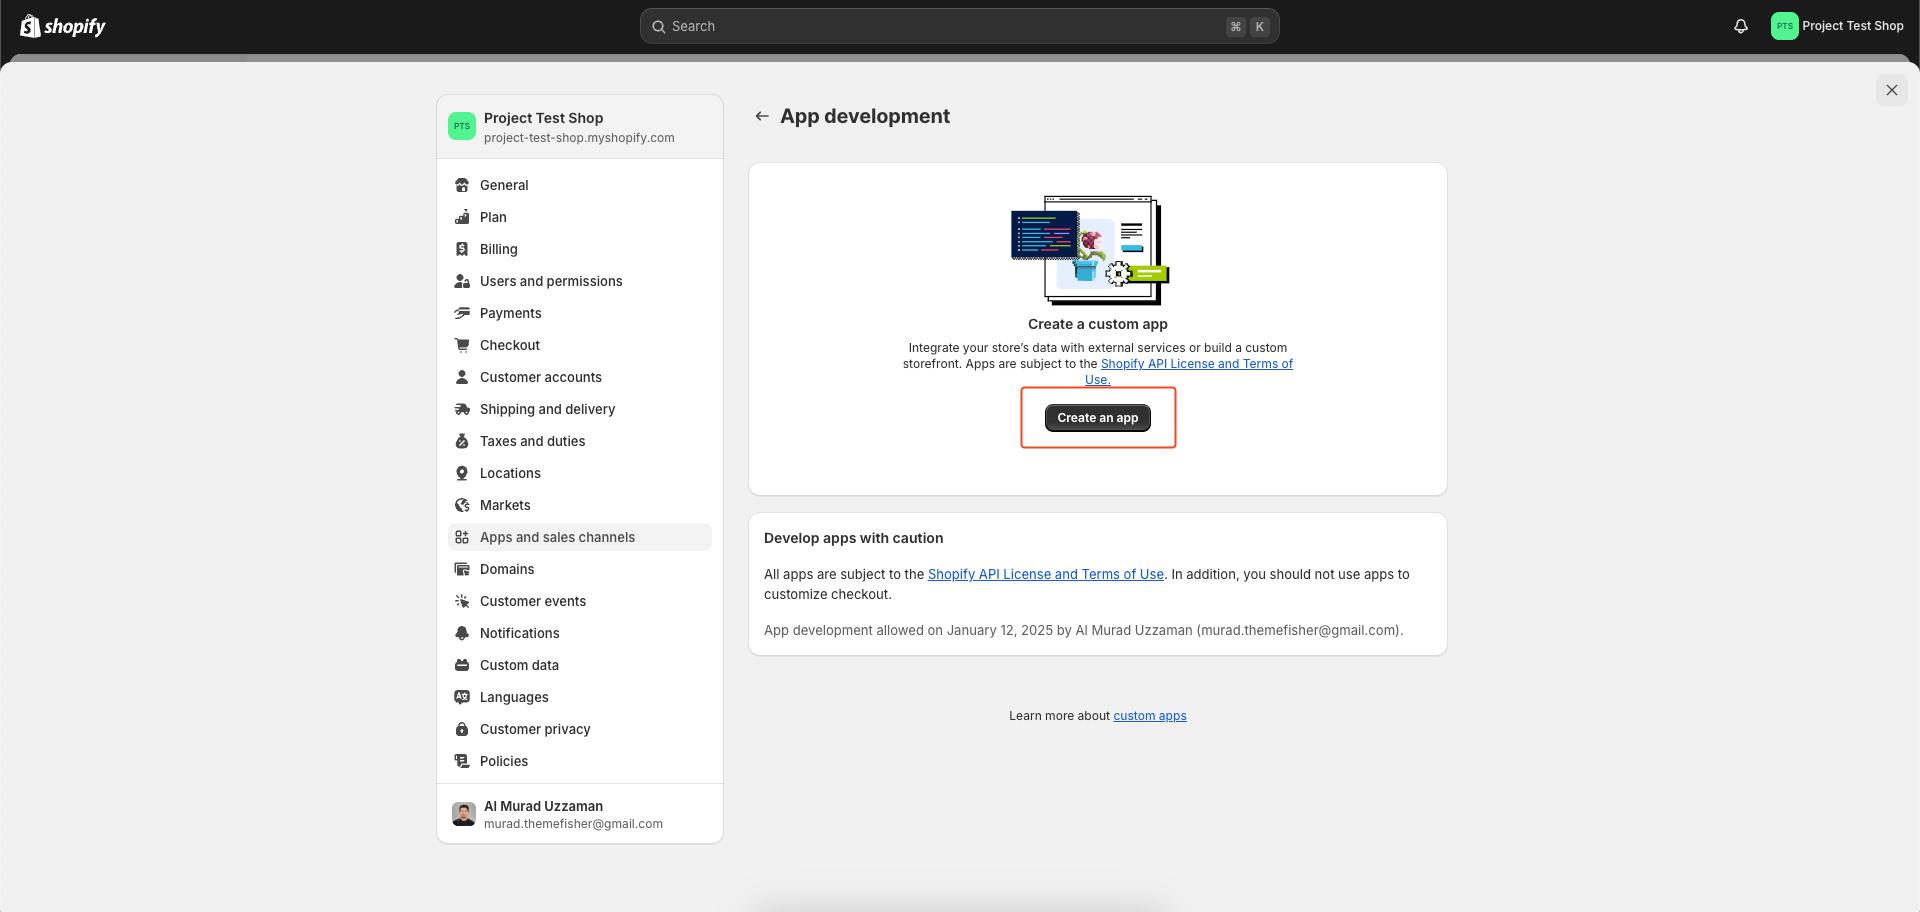
-
Now, on the App development page that opens, click on ‘Create an app’.
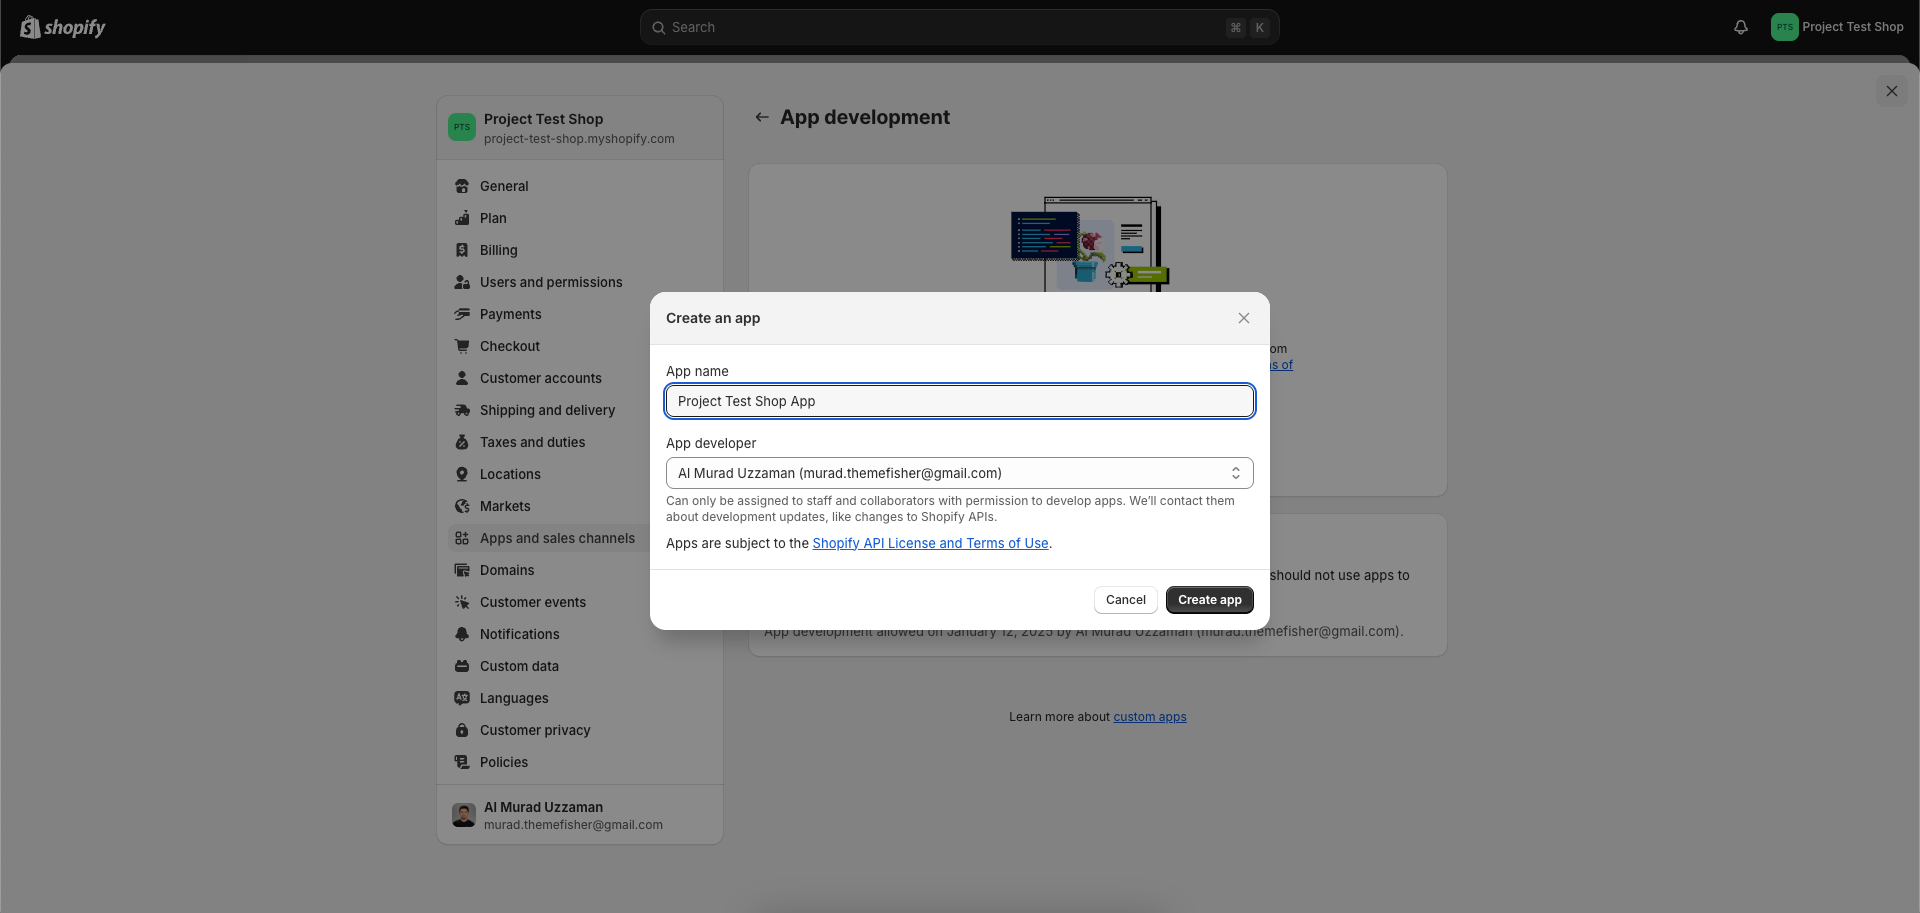
-
A ‘Create an app’ popup opens. Fill in any name in the ‘App Name’ text box. In the App Developer text box, your name and email id is automatically fetched. Else type in the same email id you used while signing up for the Shopify store.
-
Next, click on ‘Configure’ in the Storefront API integration section.
-
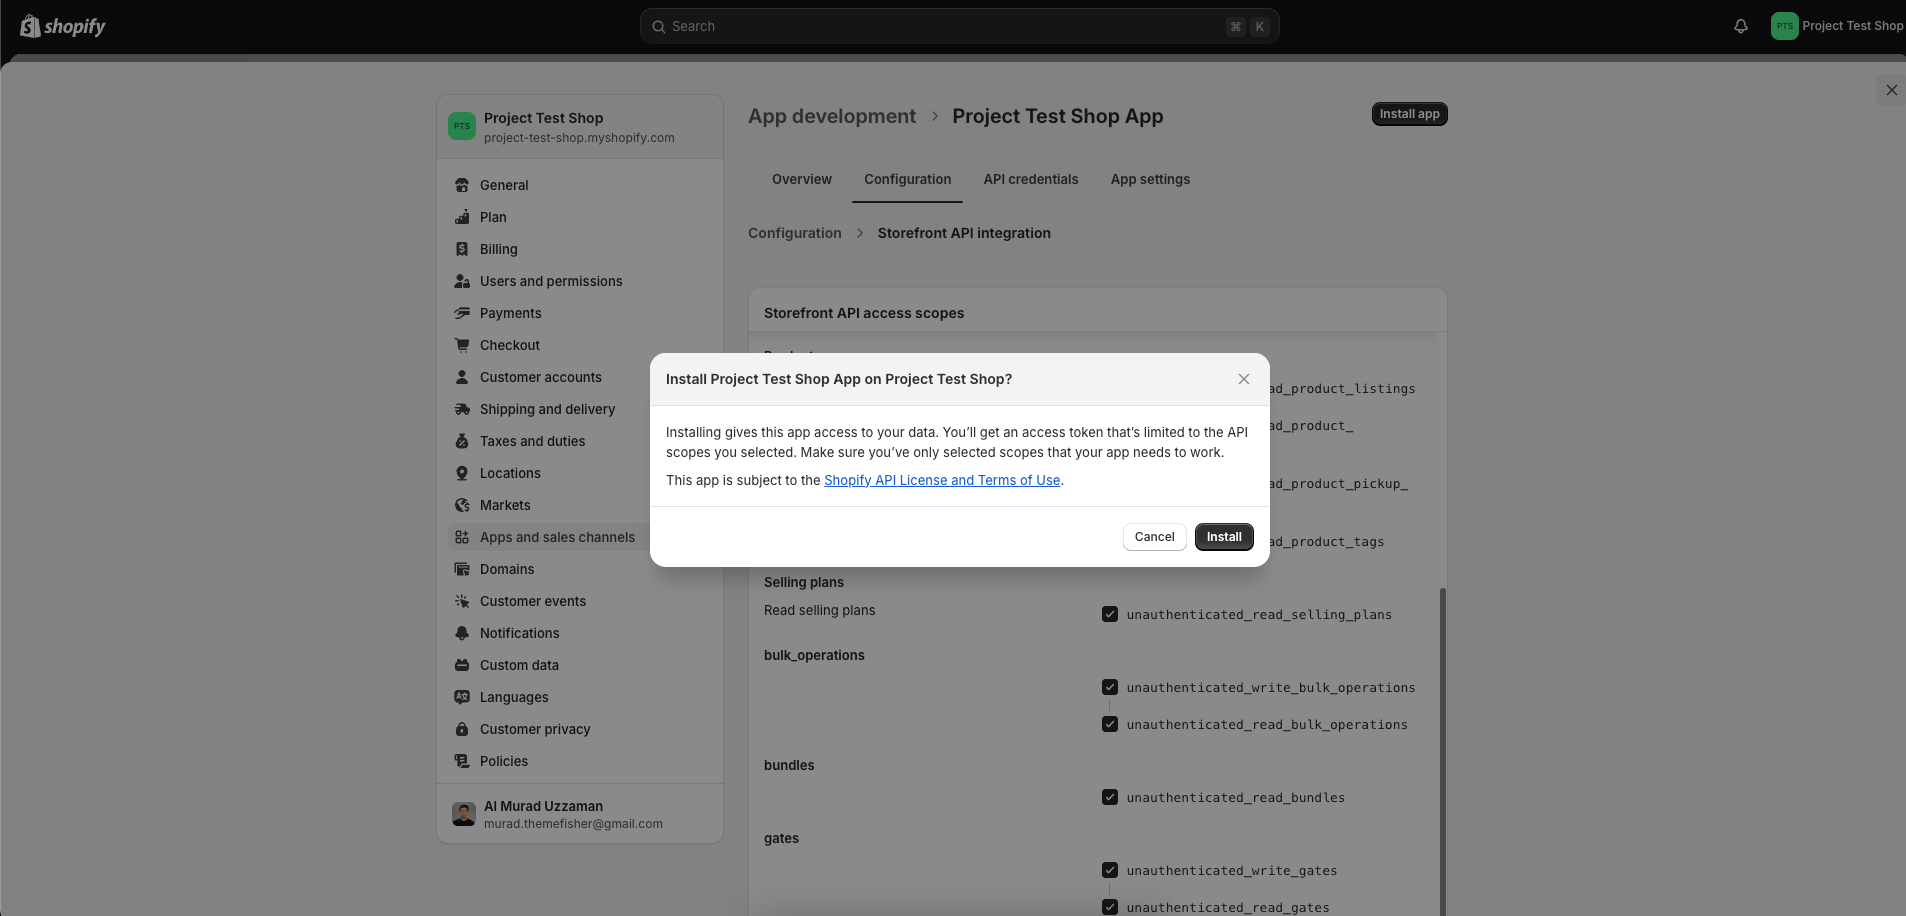
In the Storefront API access scopes, select and check all the boxes and click on ‘Save’ and then ‘Install app’.
-
Navigate to the 'API credentials' tab and locate three essential pieces of information. Subsequently, update your
.envfile by replacing the placeholder quotes("") in the.env.examplefile with your Shopify credentials.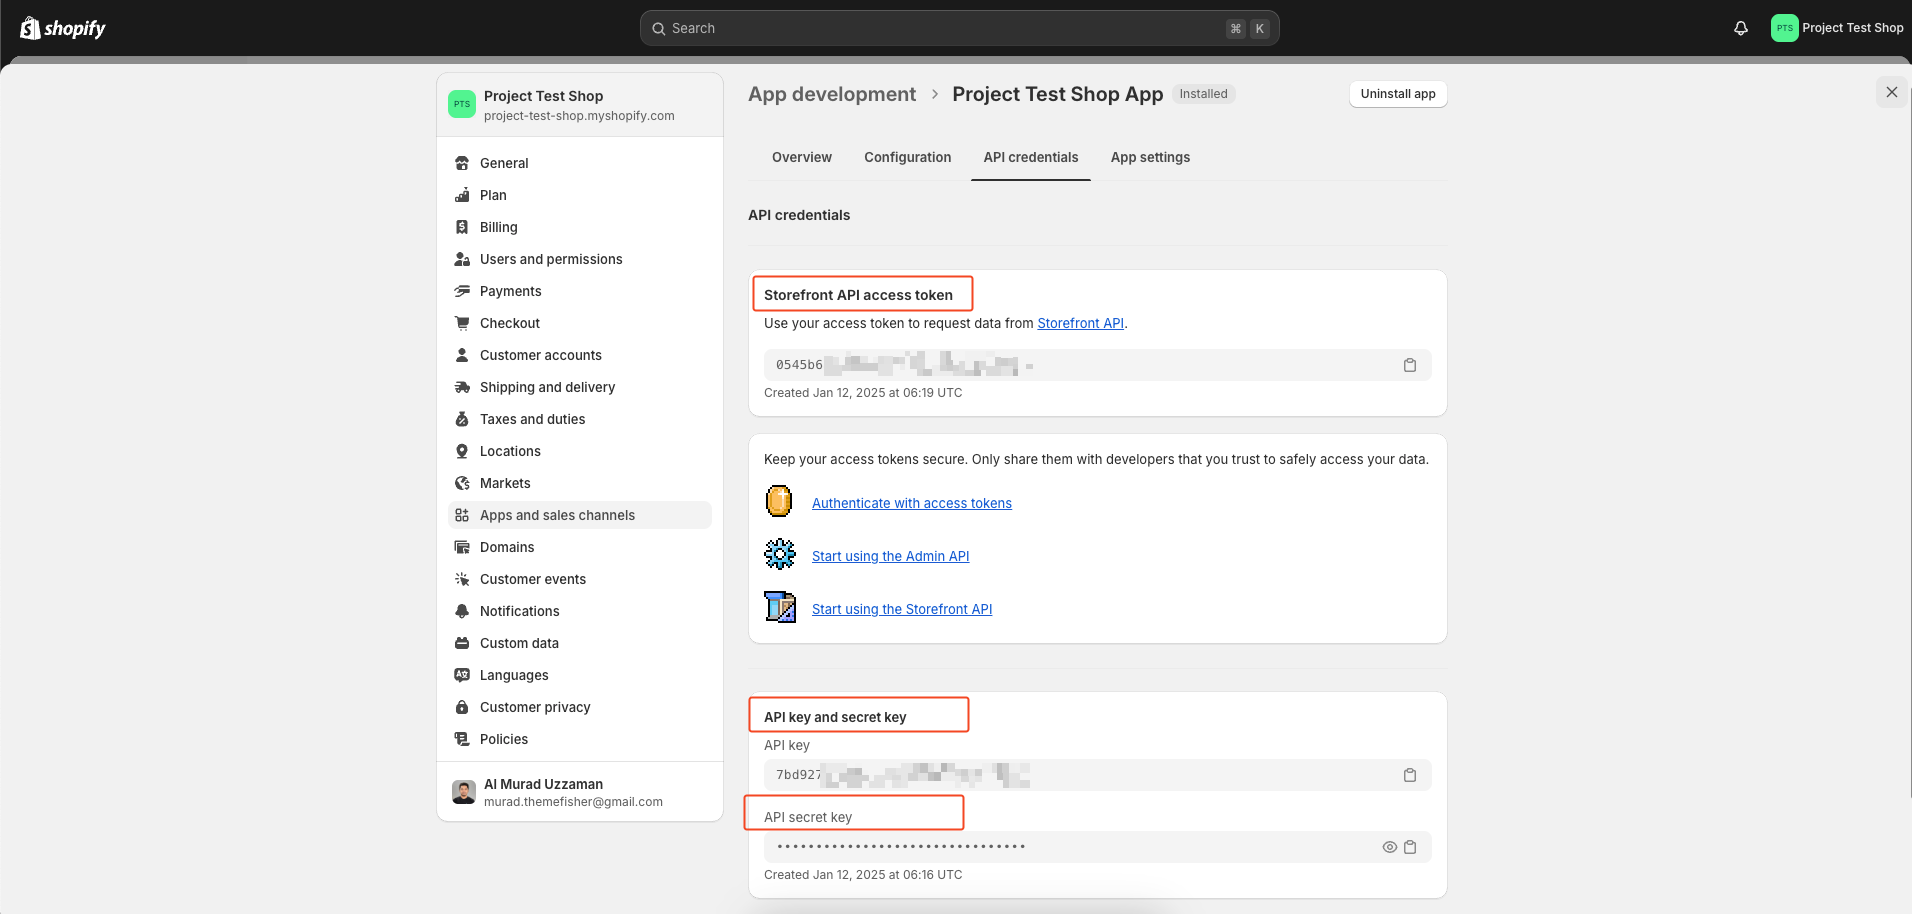
-
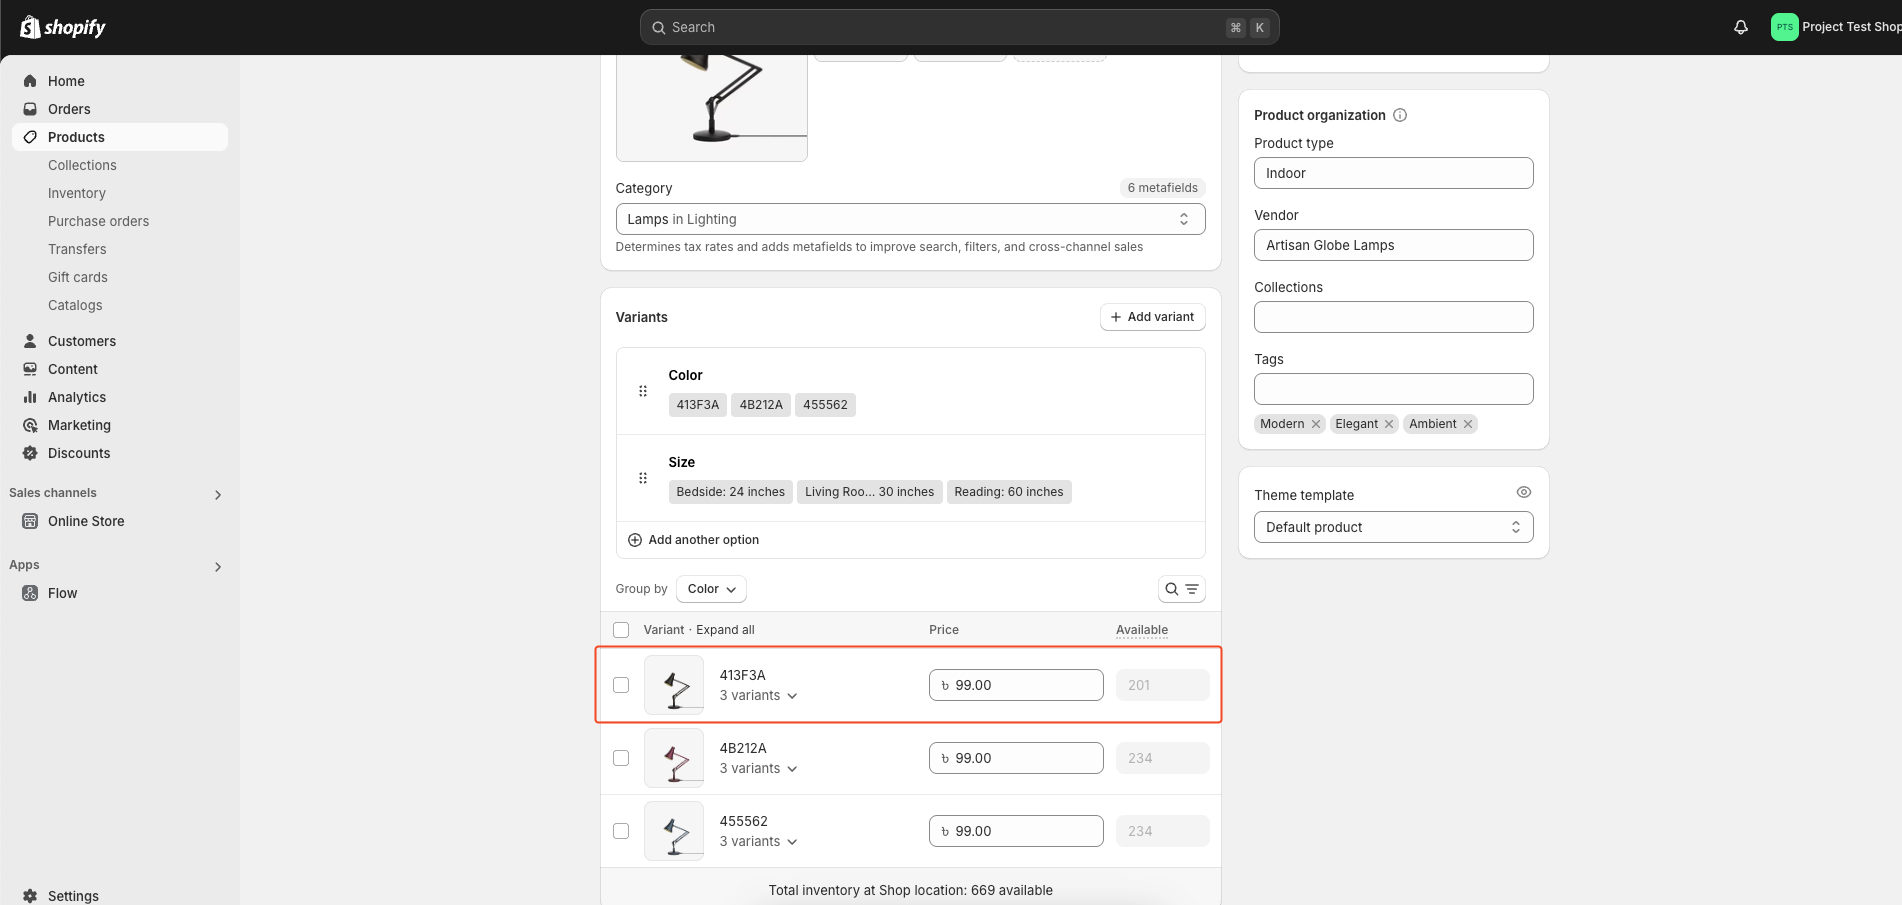
When adding your product, use the same alt title for images with the same color. This helps the first image appear as the color variant in the selector.

-
We have the option to create additional collections for products.
-
Go to the file
/src/config/config.jsonin your Shopify project and find the 'hero_slider' section. You’ll see something like this:"shopify": { "currencySymbol": "৳", "currencyCode": "BDT", "collections": { "hero_slider": "hidden-homepage-carousel", "featured_products": "featured-products" } }
-
Change the 'hero_slider' collection name to something of your choice.
-
Then, go to your Shopify Partner Dashboard, navigate to Products > Collections, and create a collection with the same name you set in the config file (e.g., 'hidden-homepage-carousel').
-
Add the products you want to display in the hero slider to this collection.
npm installnpm run devnpm run buildWe use GitHub Issues as the official bug tracker for this Template. Please Search existing issues. It’s possible someone has already reported the same problem. If your problem or idea has not been addressed yet, feel free to open a new issue.
Código base original: Storeplate — MIT License © Zeon Studio.
Adaptaciones, extensiones y personalización: MIT License.
El repositorio incluye un agente único (toallaalacarta-ops) que gestiona CI/CD y validaciones:
| Recurso | Ruta |
|---|---|
| Registro de agentes | docs/technical/agents.md |
| Catálogo de Super-Skills | docs/technical/skills.md |
| Mapeo de secrets | docs/technical/secrets-mapping.md |
| Script de validación | scripts/validate_checkout.js |
| Workflow CI/CD | .github/workflows/validate-checkout.yml |
Validar el checkout localmente:
$env:BASE_URL='http://localhost:4321'
node scripts/validate_checkout.js
Activar en GitHub Actions: pestaña Actions → Validate Checkout (Skill) → Run workflow.