A pack of custom nodes for features I regularly use.
Here are the nodes in my pack and some information on how to use them:
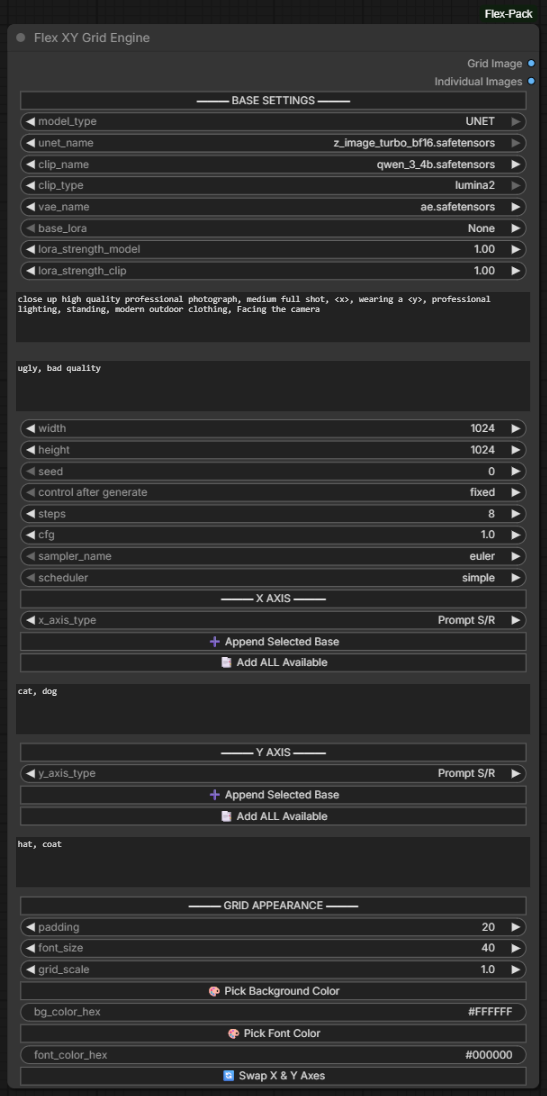
This node is designed to provide a streamlined XY comparison grid experience without the need for any extra widgets, using batches, or complex incremental counters.
- One click to run all variables and build the grid. No other nodes needed. (Yay!)
- Set a Prompt Search and Replace using
<x>or<y>in your prompt. All comma listed values will be used to replace the variable. - Set a range of values for Steps or CFG. Values can be written as "1,2,3", "1-3", or "1-6 (+2)". Using the last option would input values 1-6 by increments of 2.
- Set a list of samplers, schedulers, checkpoints, LoRAs, LoRA strengths, etc. For listed items such as these, the selected item can be appended to the list, or the full list can be added.
- Set grid appearance by adjusting padding, spacing, font size, and colors.
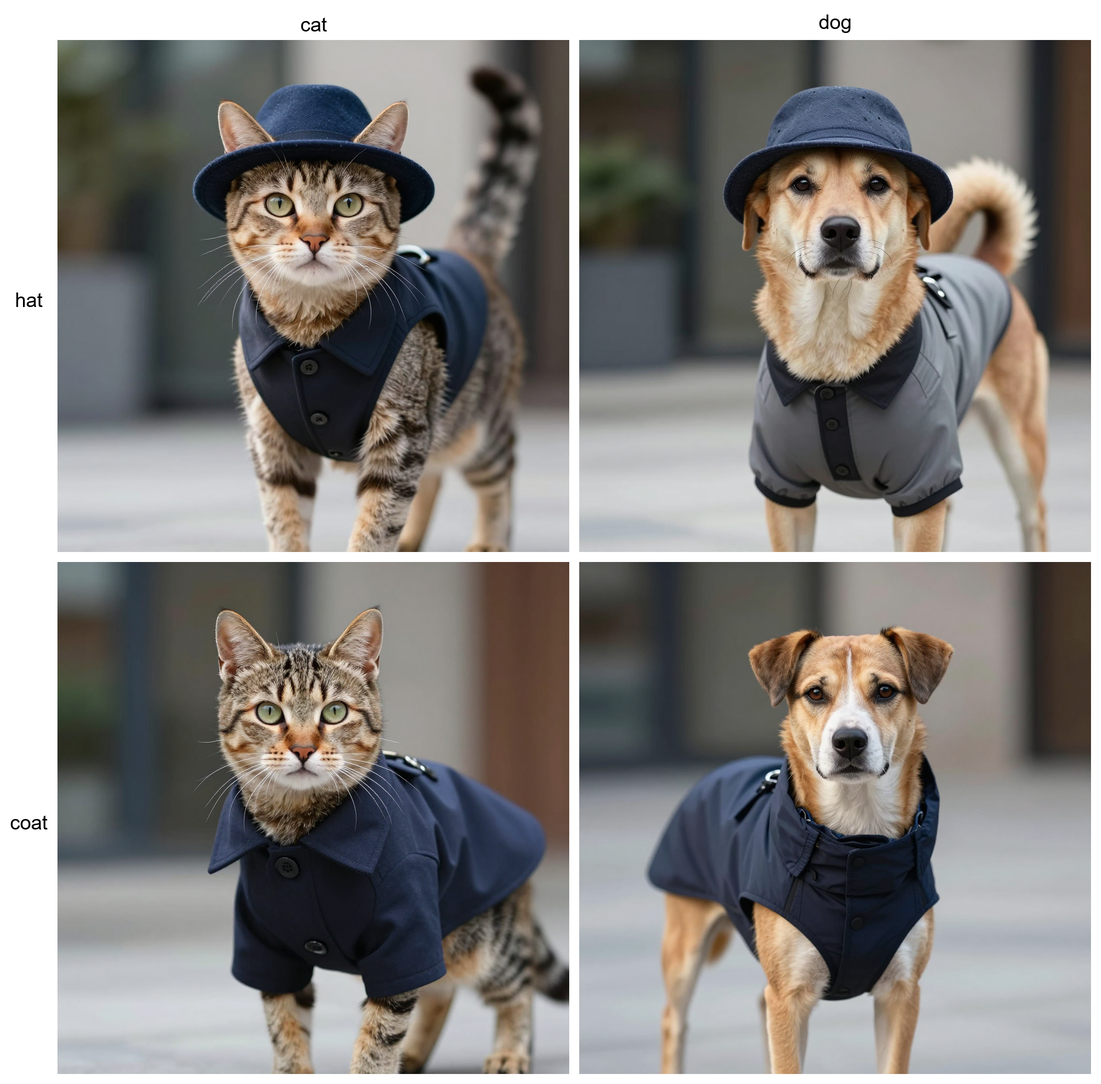
- Labels automatically set based on your variables.
- Adjust the final gride scale. Useful for very large grids.
- Output a single grid image, or each individual image from the grid.
Sample Images
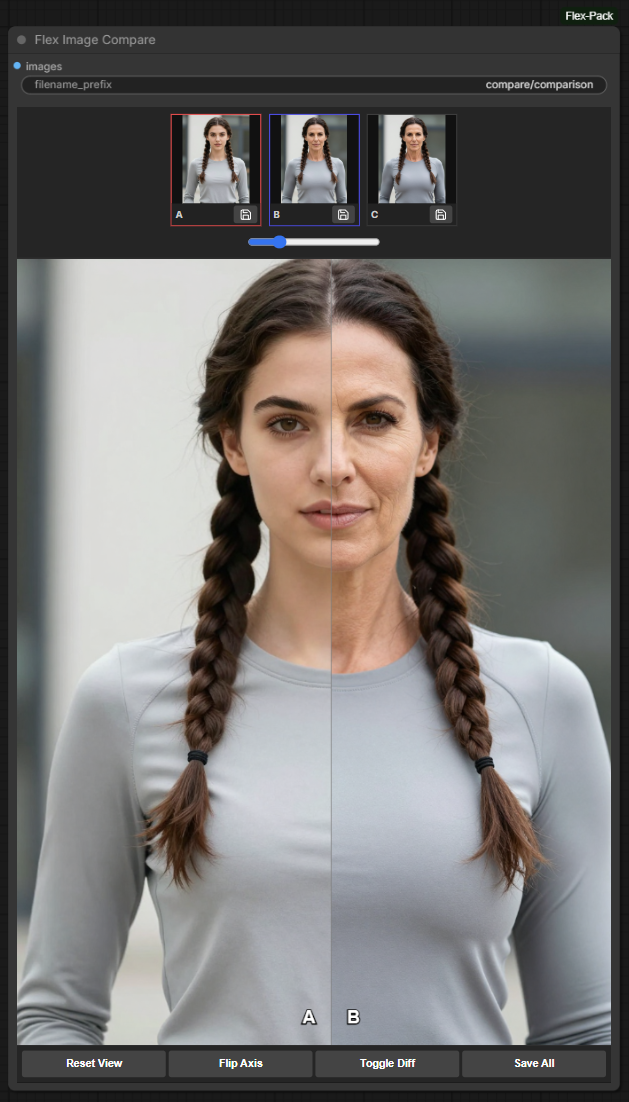
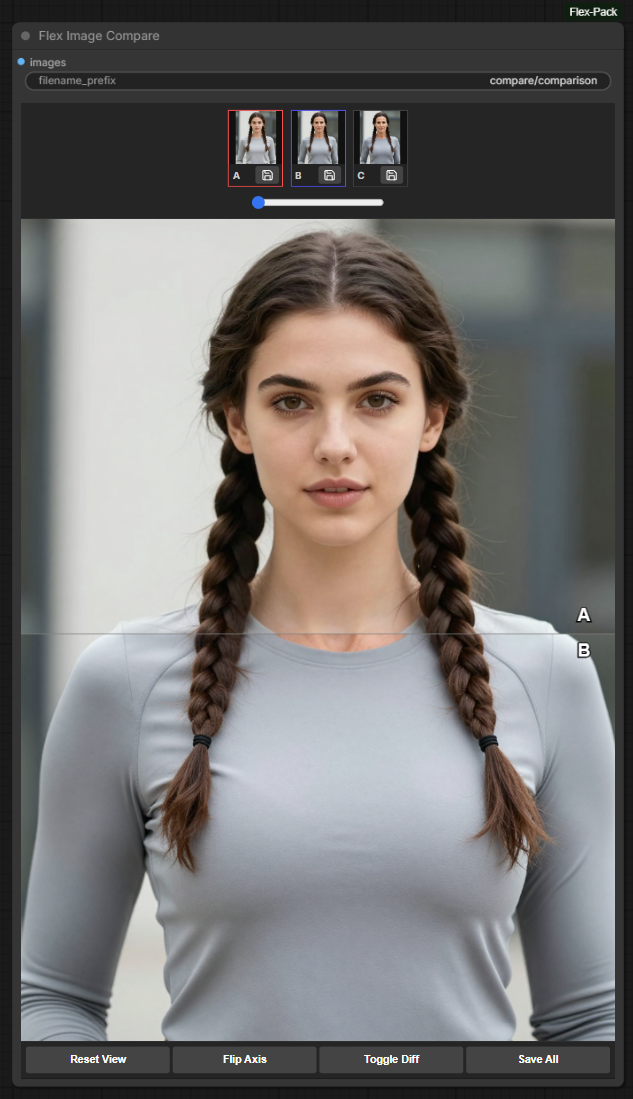
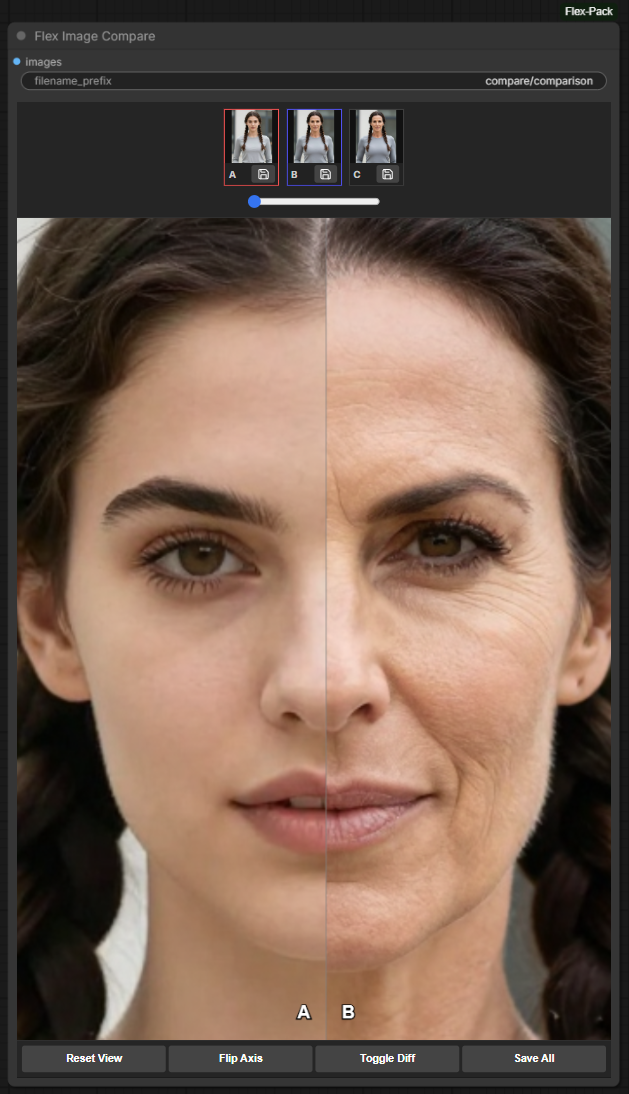
An advanced image comparison node that allows the user to compare multiple images in a batch.
- Resizable filmstrip for all input images.
- Clicking two images in the filmstrip loads up a slider comparison window with labels showing which image is on each side of the line.
- The comparison window can be zoomed in with the scroll wheel and panned with left click.
- The line can be flipped as a horizontal split or a vertical split.
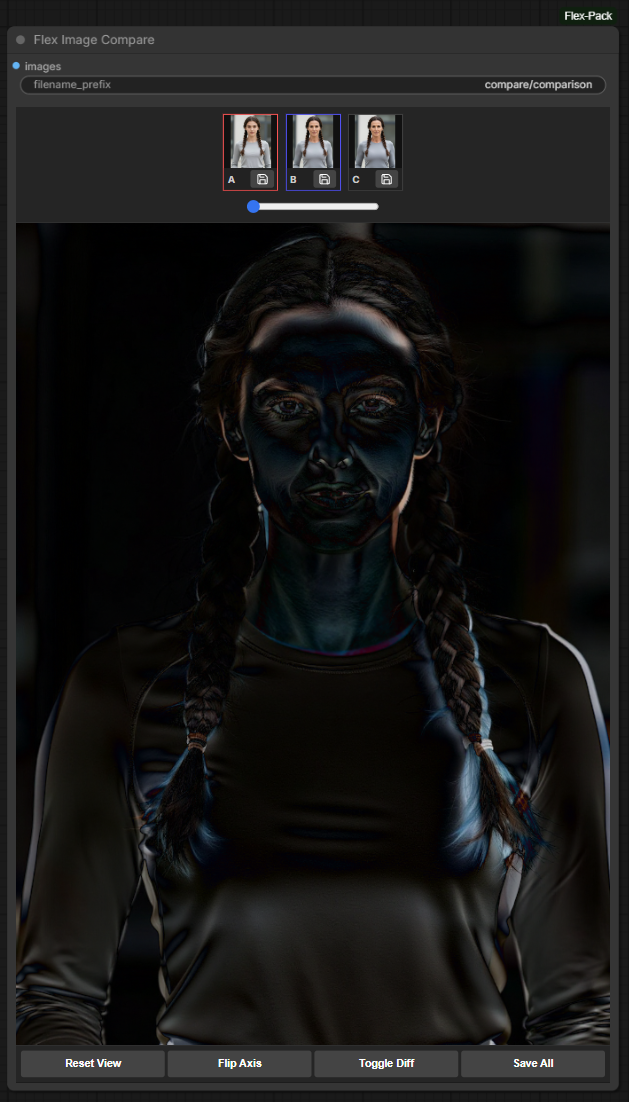
- The toggle diff allows you to see the image difference. Helpful when needing to make sure images are truly identical.
- Ability save individual images in the filmstrip or to save all images.
Sample Images
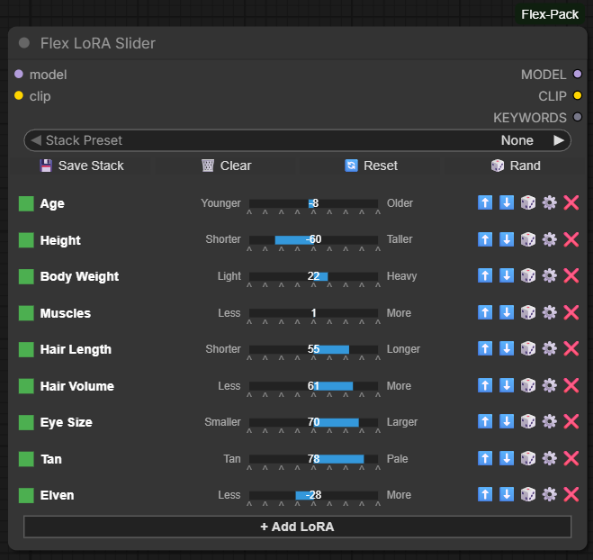
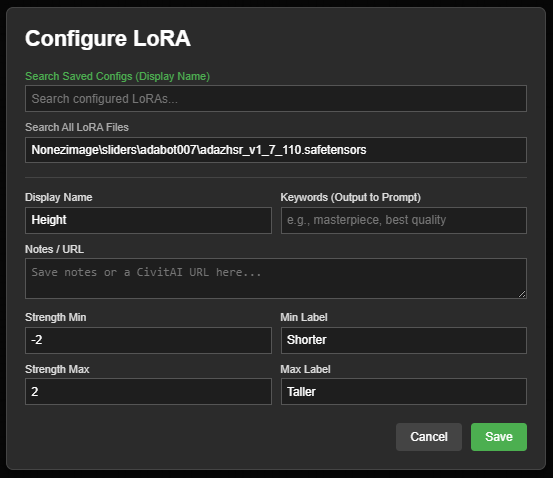
This node allows you to select a LoRA and set a display name, a min and max values with labels, keywords, and a note. These are then saved for easy use in future.
- Using a display name allows you to save your LoRA files using whatever poorly devised naming convention was used by the author, yet still recognize it in the loader.
- A slider method presented that ranges from -100 to +100 and will set a strength relative to your min and max values. For example, if a LoRA has a strength range of -2 to +4 and a setting of 50 is selected, it will use an output of strength of +2.0. Similarly, a value of -50 will output a strength of -1.0. This allows you to set your ranges one time and then forget. This means that no matter the strength, 50% should be half way to the max value. Additionally, values can be reversed to make the slider go in the opposite direction - useful for those times where you have two LoRAs that have the same effect but are inverted in how they are applied.
- Positive and negative values can be custom labeled, which is very useful when dealing with slider LoRAS. Clicking labels will increase or decrease the value by 5.
- The ability so save a stack of LoRAs as a single preset.
- The ability to output the LoRA keywords to concatenate into prompts.
- Randomization button for all LoRAs or individual LoRAs.
Sample Images
- Close ComfyUI if you have it open
- Open command prompt
- CD to your custom nodes folder within ComfyUI (likely .\ComfyUI_windows_portable\ComfyUI\custom_nodes)
- git clone this repo
- Enjoy?