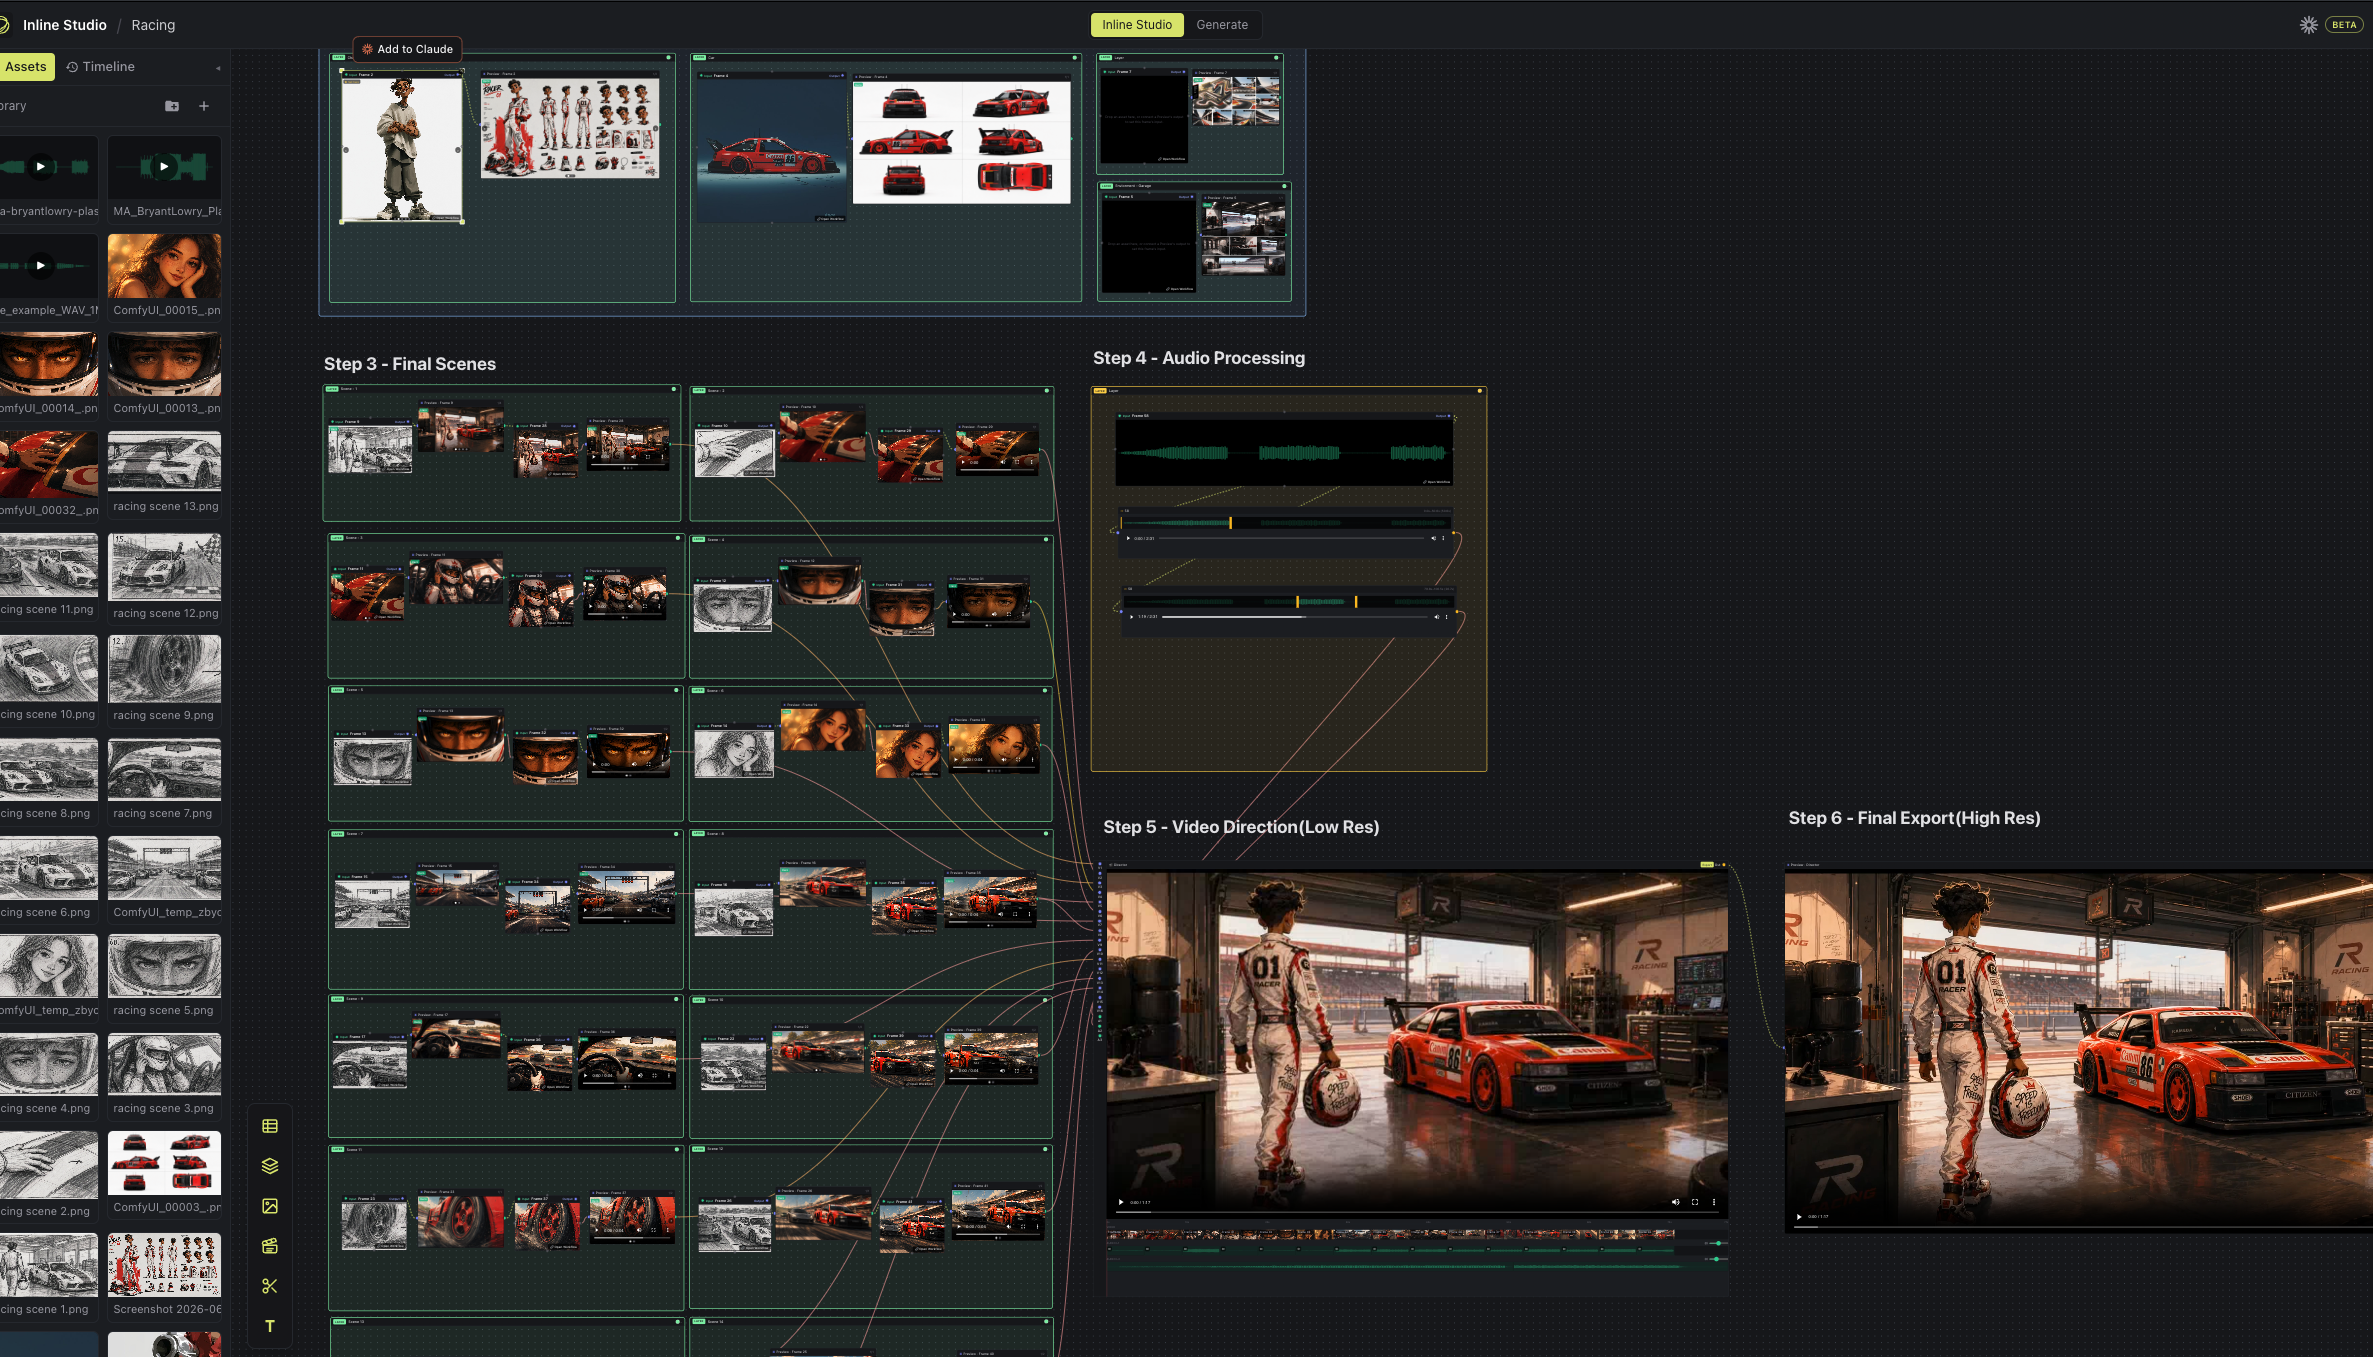
Inline Studio is a free, open-source app for AI filmmakers. Generate locally on your own GPU and train your own LoRAs on the same node canvas, with the built-in Inline Core engine and hosted fal models. Build a whole visual pipeline from moodboard to final cut, and every render is kept as a versioned, non-destructive take.




New here? Check out our getting started guide →
Contents: What is Inline Studio? · Get Started · Features · LoRA training · How it works · Two ways to generate · Inline Core engine (Krea 2, FLUX.2, MiniMax H3, ControlNet) · API Nodes · FAQ · Contributing
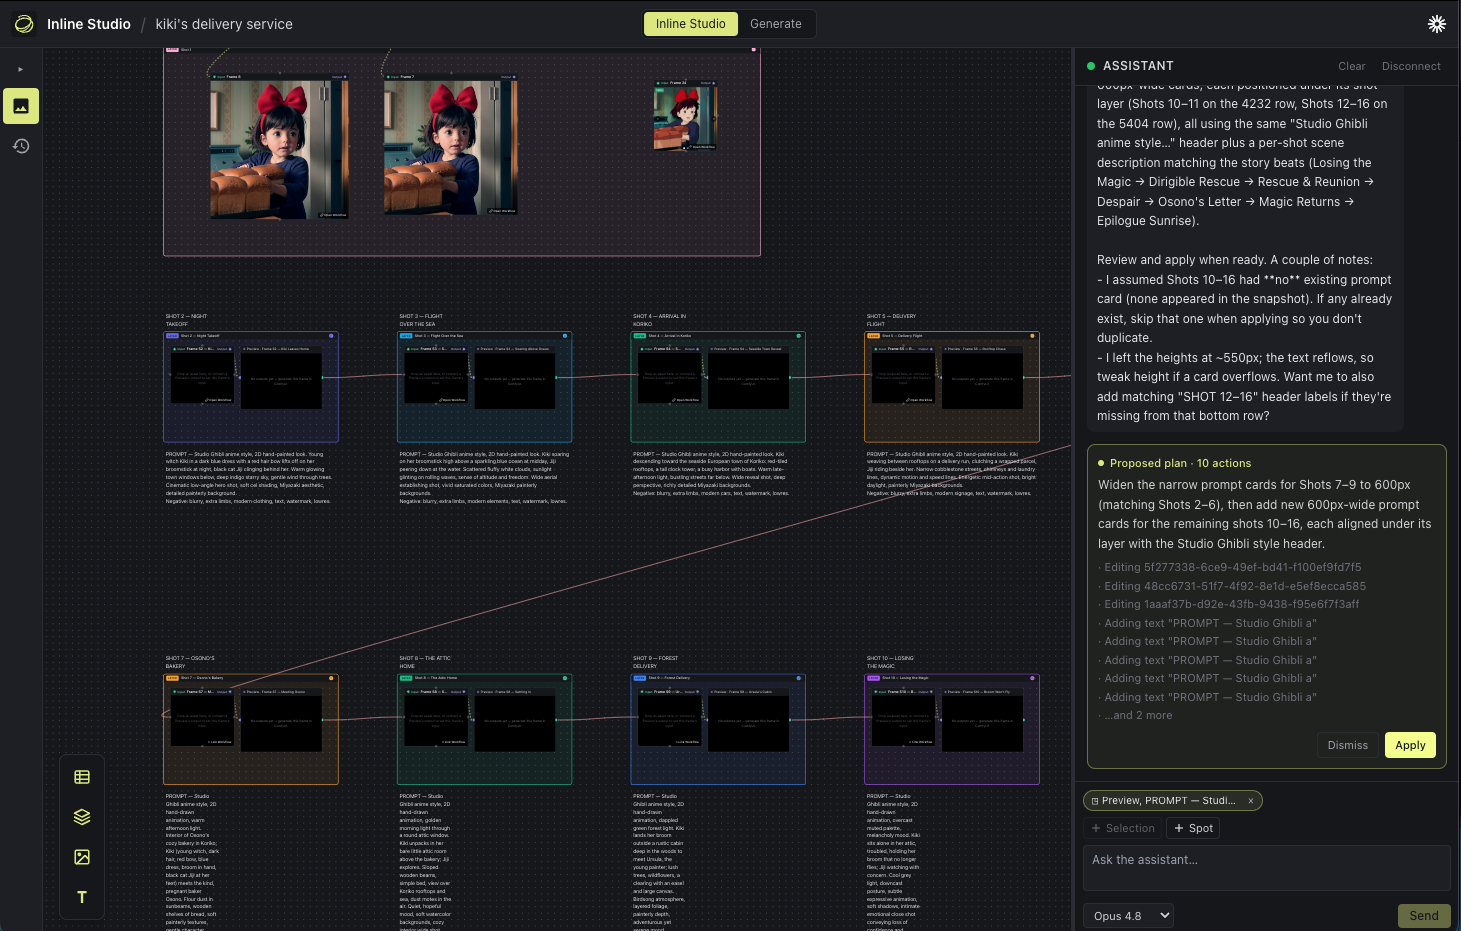
Inline Studio is a free, open-source app for AI filmmaking on a node canvas, powered by the built-in Inline Core engine (local diffusion models) and hosted fal models. It gives AI filmmakers a free-form canvas to build a whole visual pipeline, from moodboard to final cut.
- Non-destructive by default - every render is kept as a versioned take; generating again adds one, nothing is overwritten.
- Local diffusion generation engine - the built-in Inline Core engine runs popular diffusion models locally, on your own GPU, from a single model file, no external server. Currently supported: Z-Image Turbo, Krea 2 (RAW + Turbo), FLUX.2, and MiniMax H3 for video with sound.
- Train LoRAs locally - the Trainer canvas fine-tunes Z-Image, Krea 2, FLUX.2 or MiniMax H3 on your own images, on your own GPU. H3 also trains on short video clips, so a LoRA can learn motion and not just look. With a 4-bit base, Krea 2 trains at 512px inside about 12GB, so a 16GB card can train a LoRA for a 26GB model. See LoRA training.
- Hosted models via API Nodes - reach for closed models with no GPU and no setup for instant creative range; see API Nodes.
- Mix both in the same film - Inline Studio handles everything around the render: exploring options, keeping what works, and shaping a repeatable process you can iterate on and share.
It runs as a single process on one port: the Inline Core engine (Python) serves the web UI and does the generation: python core/main.py and open the browser. No desktop install, no separate backend.
Who it's for: AI filmmakers, motion artists, and generative creators who want to make AI short films and longer cuts without losing every good version along the way.
The built web UI ships as a Python package, so all you need is Python 3.11+, no Node. --install --extra all is the single command that installs everything - the engine, the local model runtime, the LoRA trainer, and the UI. On an NVIDIA machine it reads the GPU's compute capability and pulls the CUDA build of PyTorch that has kernels for it, RTX 50-series included.
macOS / Linux:
git clone https://github.com/inlineresearch/Inline-Studio.git
cd Inline-Studio/core
./webui.sh --install --extra all   # one command: installs everything
./webui.sh                         # then run, on http://127.0.0.1:8848
Windows (use webui.bat - webui.sh is a bash script and won't run in PowerShell; you can also double-click it):
git clone https://github.com/inlineresearch/Inline-Studio.git
cd Inline-Studio\core
.\webui.bat --install --extra all
.\webui.bat
That's it: --install sets up the environment and installs everything once, then webui.sh / webui.bat runs the app on one port. See Command-line options for every flag (--listen, --port, --lowvram, --multi-gpu, …).
Everything lands in core/.venv, which Inline Studio owns. If you already have another virtualenv or conda env activated in that shell (a ComfyUI one, say), it is left completely untouched - --install says so and carries on. Re-running --install is safe: an existing core/.venv is reused, so adding an extra later is just another --install --extra NAME.
Prefer pip over the launcher? pip install -r requirements.txt (from the repo root) installs the whole app - engine, UI, model runtime, and trainer - from PyPI; then run inline-studio.
GPU, CPU, Apple Silicon, and ROCm setup
Honest status - what's actually been run, versus what has a code path but no one has verified:
| Hardware | Status | Extra steps |
|---|---|---|
| NVIDIA, Linux | Tested - Z-Image Turbo 1024² on a T4 (16 GB); Krea 2 1024² and LoRA training on an L40S (48 GB) | None. webui.sh --install picks the CUDA build automatically. |
| NVIDIA, Windows | Supported, needs one step | Run .\webui.bat --install (the Windows launcher). PyPI's default torch is CPU-only on Windows, so --install reads your GPU's compute capability and pulls the matching CUDA build: cu130 for RTX 50-series (Blackwell), cu126 for everything older. Override it with --torch-index - see RTX 50-series below. |
| Apple Silicon (MPS) | Code path exists, untested | None. int8 quantisation doesn't apply on MPS, so a model too big for unified memory won't fit. |
| AMD (ROCm), Linux | Untested - reports welcome | Needs a ROCm build of PyTorch - see AMD (ROCm) setup below. |
| CPU only | Works, very slow | ./webui.sh --cpu (Windows: .\webui.bat --cpu) |
RTX 50-series cards (5060/5070/5080/5090 and the RTX PRO Blackwell line) are compute capability sm_120, and no PyTorch wheel built for CUDA 12.4 or 12.6 has kernels for them. --install handles this: it reads the compute capability off the driver and picks cu130, so a plain .\webui.bat --install --extra all is all you need.
Two cases where you may want to say it yourself:
rem Blackwell card, but a driver older than CUDA 13 (R580) - cu128 has sm_120 and a lower floor
.\webui.bat --install --extra all --torch-index cu128

rem Or set it once for the shell, same effect
set INLINE_TORCH_INDEX=cu128
--torch-index takes a short name (cu130, cu128, cu126), a full index URL, or cpu to force the CPU-only build. webui.sh takes the same flag. If the installed build turns out to have no kernels for your card, Core says so by name at startup rather than leaving you with PyTorch's own sm_120 is not compatible warning.
Nobody has verified Inline Studio on AMD yet, so treat this as a starting point rather than a supported path. Install everything normally first, then replace PyTorch with the ROCm build - doing it in this order means nothing can quietly overwrite your ROCm torch afterwards:
cd core
./webui.sh --install --extra runtime         # engine + runtime (pulls the default PyPI torch)

# Replace torch with the ROCm build. Pick the index that matches YOUR ROCm version -
# check https://pytorch.org/get-started/locally/ (rocm6.2 shown here as an example).
# --python pins the install to Inline Studio's venv, whatever is activated in your shell.
uv pip install --python .venv/bin/python --force-reinstall \
  --index-url https://download.pytorch.org/whl/rocm6.2 torch

# Verify you actually got a ROCm build (hip should print a version, not None):
.venv/bin/python -c "import torch; print(torch.cuda.is_available(), torch.version.hip)"
Then run ./webui.sh as usual.
Three gotchas:
- Don't run
uv syncafterwards - it re-resolves the environment against the lockfile and will pull the PyPI torch back over your ROCm build. Useuv pip install --python .venv/bin/pythonfor follow-up installs. The same applies to a hand-picked CUDA index. - Don't pass
--recreate- it rebuilds.venvfrom scratch and your ROCm torch goes with it. A plain--installre-run reuses the venv and is safe. - ROCm presents itself through
torch.cuda, so the engine will treat it as a CUDA device and may largely work. But the dtype heuristics key off NVIDIA compute capability (< 8.0→ fp16), which is meaningless on RDNA/CDNA, and the int8 (torchao) path is unverified on ROCm. If it works - or doesn't - open an issue; that's the fastest way to get AMD properly supported.
Known limits, so you can judge before installing:
- Local model coverage is Z-Image Turbo, Krea 2 and FLUX.2 today. SDXL and others are planned; hosted models via API Nodes need no GPU at all.
- Krea 2 is a 12.9B model and needs a big card to generate. The bf16 checkpoint is 26 GB on disk, and generation peaks around 36 GB at 1024 with guidance on, so a 40 GB+ GPU is the practical floor for inference. Training is cheaper than generating, because the 4-bit base path puts Krea 2 LoRA training at 512 inside 12 GB - see Benchmark results. Z-Image remains the low-VRAM path for generation.
- 1024² with Guidance (CFG) above 0 needs more than 16 GB. CFG runs the prompt and negative prompt together, doubling the denoise. Z-Image Turbo is distilled to run CFG-free - at Guidance 0, 1024² fits in ~11.5 GB. FLUX.2 klein 4B peaks near 17.9 GB at bf16, so 24 GB holds it resident and a 16 GB card runs it quantized instead.
Build the UI and run the engine locally
To hack on the web UI you need Node.js 20.11+ as well, and you serve a local SPA build:
git clone https://github.com/inlineresearch/Inline-Studio.git && cd Inline-Studio

# 1. Build the web UI
npm install
npm run build:spa                        # -> dist-web/

# 2. Set up + run the engine, serving your local build
cd core
uv sync --extra server --extra runtime   # server + the local model runtime (torch/diffusers)
uv run python main.py --front-end-root ../dist-web
uv sync here manages core/.venv as a project environment - it is exact, so it removes anything not in the lockfile (including the inline-studio-frontend package a previous --install may have added, which doesn't matter when you're serving --front-end-root ../dist-web).
Then open http://127.0.0.1:8848. Add your fal.ai API key in Settings for hosted models, and set up local generation as in Two ways to generate. The canvas and planning work without any models.
Hot-reload: run the engine as above, then in another terminal npm run dev:web (Vite serves the UI with HMR and proxies API calls to Core).
The friendly launcher (in core/) maps flags onto the engine's INLINE_* environment knobs: webui.sh on macOS/Linux, webui.bat on Windows. core/main.py takes the same flags when you run the engine directly. ./webui.sh --help (or .\webui.bat --help) lists them all.
Show all command-line flags
webui.sh / main.py flag |
Env var | What it does |
|---|---|---|
--listen |
INLINE_HOST=0.0.0.0 |
Bind all interfaces so other machines can reach it |
--host ADDR |
INLINE_HOST |
Bind a specific address (default 127.0.0.1) |
--port N |
INLINE_PORT |
Port to serve on (default 8848) |
--models-dir PATH |
INLINE_MODELS_DIR |
Where model weights are scanned from (default ./models) |
--data-dir PATH |
INLINE_DATA_DIR |
Where runs + takes are written (default ./.inline) |
--lowvram |
INLINE_PROFILE=lowvram |
Tight-VRAM profile (VAE tiling/slicing, attention slicing) |
--cpu |
INLINE_PROFILE=cpu |
Force CPU generation |
--profile NAME |
INLINE_PROFILE |
Set the profile explicitly: gpu-max | lowvram | cpu |
--vram-budget GB |
INLINE_VRAM_BUDGET_GB |
Treat the GPU as having GB of usable VRAM |
--multi-gpu [SPEC] |
INLINE_PARALLEL |
Split one image's denoise across GPUs (e.g. pipefusion=2); auto with 2+ GPUs |
--front-end-root DIR (main.py) |
INLINE_FRONTEND_ROOT |
Serve a local SPA build instead of the installed UI package (dev) |
--rebuild (webui.sh) |
n/a | Force a fresh SPA build (npm run build:spa) from source and serve it on the one port; use after UI changes when not running --dev. Needs the repo checkout + Node/npm |
webui.sh also has --install / --extra NAME to set up the venv, plus --torch-index WHICH (INLINE_TORCH_INDEX) to override the PyTorch wheel index picked from your GPU's compute capability, --recreate (rebuild .venv from scratch) and --use-active-env (install into / run from the environment activated in your shell instead of .venv). New to Inline Studio? The Getting Started guide walks you through your first render.
- Free-form node canvas - lay out your whole AI film like a mood board that can actually generate. Marquee-select, copy/paste, undo/redo, layers, and text notes all work the way your hands expect.
- Versioned, non-destructive takes - every render is kept. Generating again adds a new take; nothing is overwritten. Star the keeper and it flows downstream.
- Chain frames into a generative pipeline - wire one frame's output into the next frame's input. Refine a shot, feed it forward, regenerate the source, and everything downstream follows.
- Video editing on the canvas - the Video Director node is a timeline-in-a-node that assembles your rendered frames into a single cut, with layered audio (the videos' own audio plus your own music/VO), per-input and per-layer volume, an in-node preview to scrub, and high-res export; the Trim Video/Audio node lets you drop in a clip, drag the in/out handles over its filmstrip/waveform, and pass just the trimmed segment downstream.
- Local generation, built in - the Inline Core engine runs diffusion models locally, on your own GPU. Z-Image Turbo, Krea 2, FLUX.2, and MiniMax H3 video from single model files (or a diffusers folder for a prequantized build), no external server to set up.
- Multi-reference composition - with FLUX.2, wire several images into one node and compose from them: "the character from image 1 wearing the jacket from image 2". The node numbers the references on its face so the prompt can address them by position. One image edits it, several combine them. See FLUX.2.
- Train your own LoRAs locally - the Trainer tab is a second canvas where the dataset, captioning, training run, and loss curve are all nodes. Training runs on your own GPU, the finished LoRA drops into
models/loras/, and it shows up in the LoRA loader node ready to generate with. See LoRA training. - API Nodes for hosted models - run closed models right on the canvas with no GPU. Add a Generate node, pick a model, and bring your own provider key. See API Nodes.
- Community extensions - install custom nodes from a GitHub repo in one click, security-reviewed and dependency-isolated. Browse the registry or build your own.
- Free & open source (GPL-3.0) - one process (Python + a browser); runs on macOS, Windows, and Linux.
Follow our Animated Short Film with LTX 2.3 and GPT Image Generation tutorial →
Train a LoRA on your own images without leaving the app, on your own GPU, with no cloud step. The Trainer tab is a second canvas: wire up the nodes, press Start, and watch it run. When the run finishes, the .safetensors lands in models/loras/, where the LoRA loader node picks it up automatically, so you can generate with it over in the Studio tab straight away.
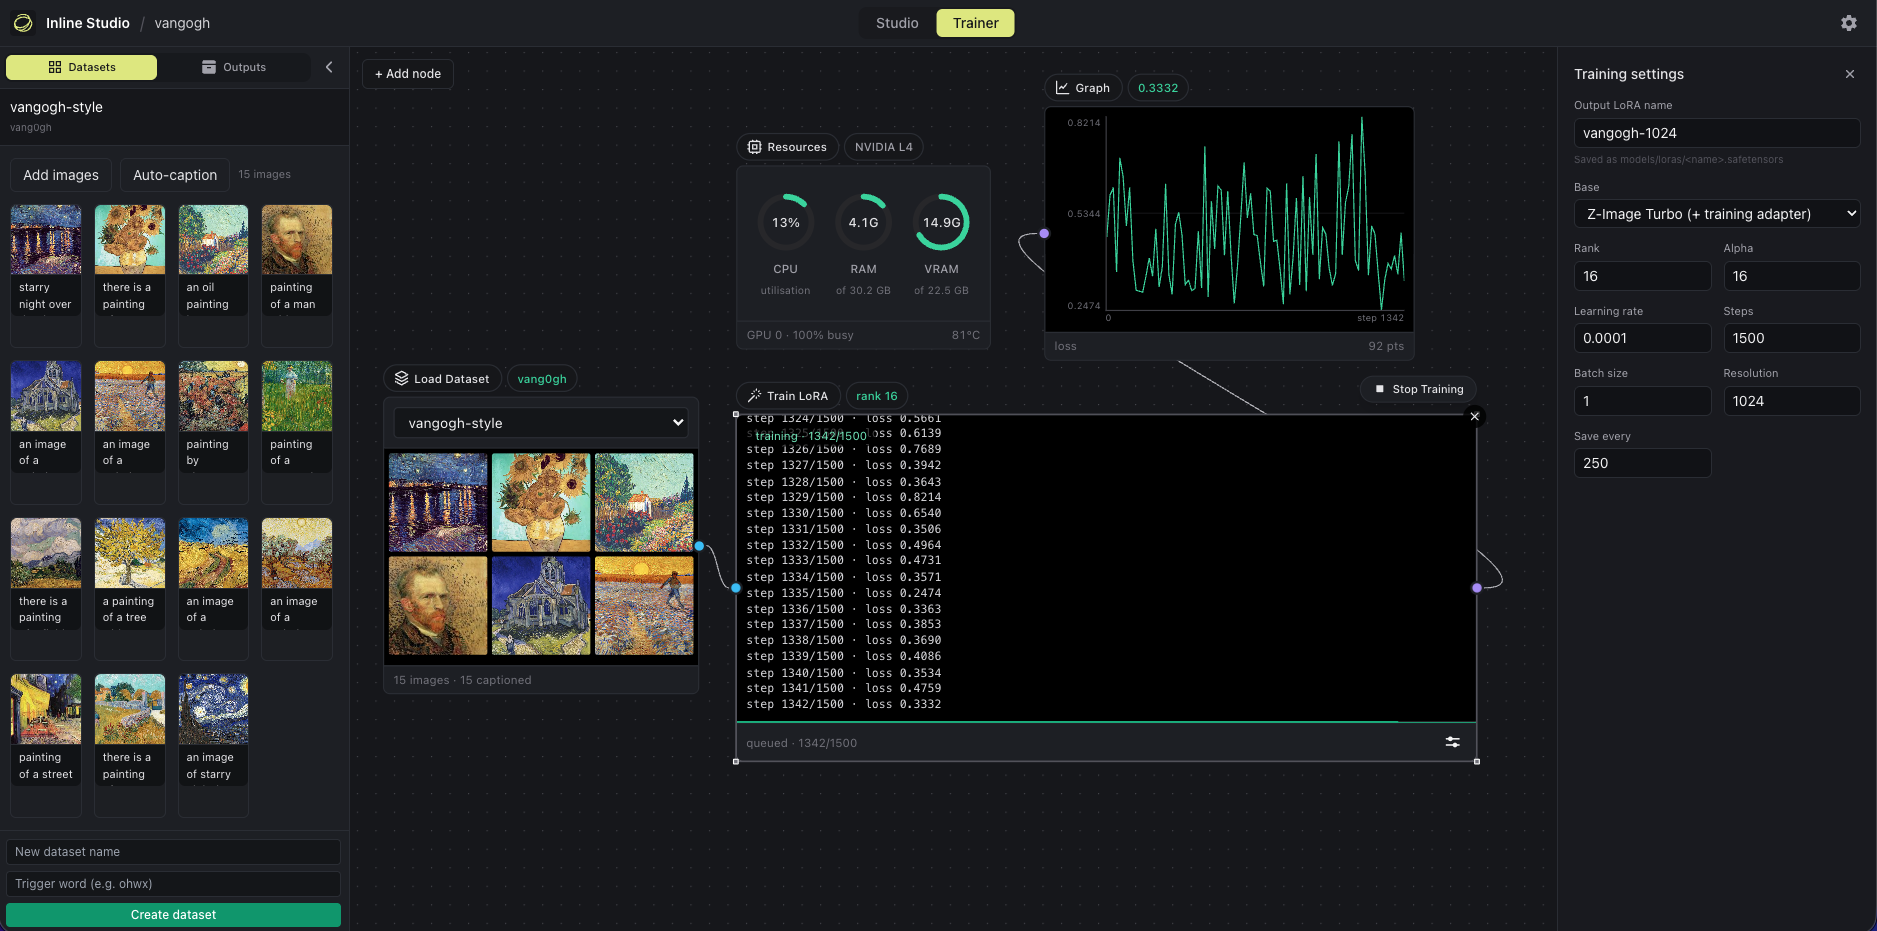
Five nodes, wired left to right, with the hyperparameters behind an Adjust button so the node face stays a status surface:
[ Load Dataset ] --> [ Caption ] --> [ Train LoRA ] --> [ Graph ]
                                          |
                                          +--> Resources (VRAM monitor)
Peak VRAM at 512px, 12 steps, rank 16, batch 1, gradient checkpointing on:
| Architecture | 512px peak | 16GB card |
|---|---|---|
| FLUX.2 (klein Base 4B) | ~8.6GB | yes |
| Krea 2 (4-bit base) | ~11.9GB | yes |
| Z-Image | ~13.4GB | yes |
| MiniMax H3 (4-bit, video) | ~20.6GB | yes, slowly |
Training is cheaper than generating, and a LoRA trained at 512 applies at any generation resolution. Full per-card matrix, both resolutions and the timings: Benchmark results.
If you installed with --extra all from Get Started, the trainer is ready. Otherwise:
cd core
./webui.sh --install --extra training   # Windows: .\webui.bat --install --extra training
For a worked example, see inlineresearch/skin-lora-krea-2-raw, a photorealistic skin LoRA trained here on the Krea 2 RAW base from the 26 image and caption pairs published as inlineresearch/krea2-skin-lora.
TRAINING.md is the full reference: which base to train on · measured benchmarks · datasets and outputs · stop and resume · trigger words · base precision
Generating a single frame is the easy part. The work that makes an AI film is what comes after: exploring options, keeping what's good, and shaping a repeatable process out of it. Inline Studio is the layer where that happens, organised around one model:
From the home screen, Export zips a project into one archive. Import it on the other side and you get everything back: the inputs (every imported asset), the outputs (all the generated takes), and the graph that turned one into the other. Whoever opens it can re-run the pipeline exactly and keep iterating.
Pick whatever fits the shot, and mix both in one film. However you render, the frame keeps its full take history, so you never lose a good version.
| How you render | What it's like | What you need |
|---|---|---|
| Local GPU: Inline Core (built in) | Drop a Z-Image Turbo, Krea 2, FLUX.2, or MiniMax H3 node, wire a prompt, hit Run: one node, no loader/sampler wiring. A single .safetensors is usually all you bring (a prequantized build can be a diffusers folder); the engine pairs it with a VAE + text-encoder and downloads nothing behind your back. Two or more GPUs? It can split one image's denoise across them (xDiT). |
Runs locally on your own GPU. No account, no external server. Low-VRAM friendly: it auto-fits the model to your card (streaming weights, int8, then NF4) so a model too big for full precision still runs, with no flags. |
| Hosted: API Nodes | Add a Generate node and pick a model: hosted, closed models across image, video, and audio. No GPU, instant range. See API Nodes for the model list and providers. | A provider key (currently fal); it stays on your machine, and you pay per render (each node estimates the price first). |
For local generation, either drop a .safetensors into core/models/diffusion_models/, or add a model node and use its model popup (a blinking hint shows up when something's missing) to download the diffusion model, VAE, and text-encoder into core/models/, with visible progress. The canvas and planning work with no models at all. See Krea 2 and FLUX.2 for those models' files and VRAM.
Inline Core is a from-scratch generation engine for local rendering. It keeps the open node-graph model (a typed DAG of nodes and edges → immutable "takes"), and Inline Studio drives it as a single process.
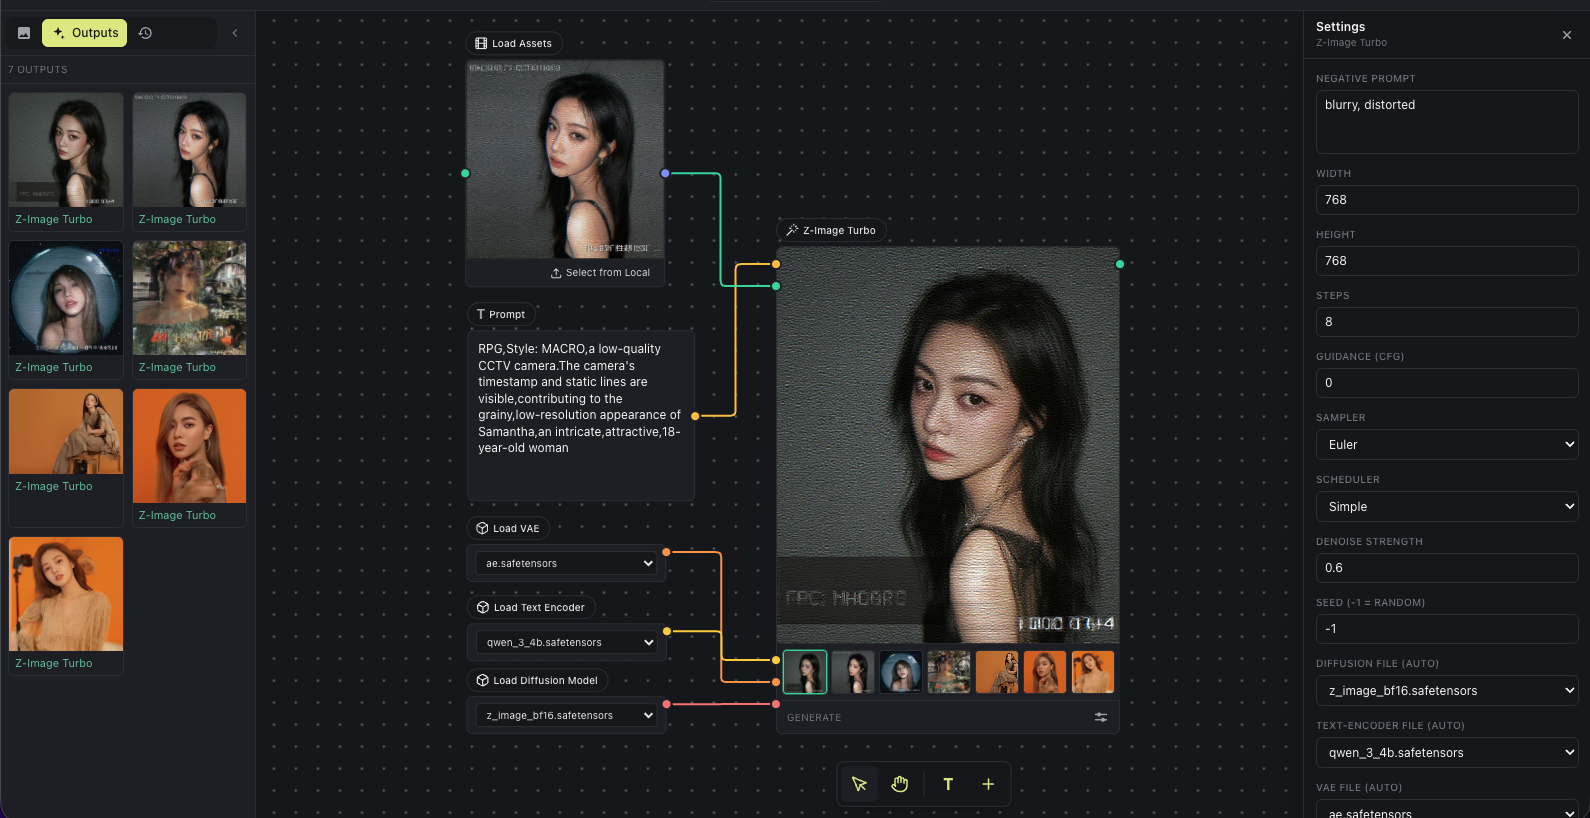
- One process, one port - Inline Studio is a web SPA (React) served by Inline Core (a headless Python engine, in
core/).core/main.pyruns Core, which serves the built UI and is the app's backend. - Core owns the backend - the browser reaches it over a small typed RPC/WebSocket contract; Core owns the project database, the filesystem, generation, and the ffmpeg timeline. No Electron, no separate Node server, nothing external to stand up.
- Typed graph, checked before it runs - named params and type-checked edges, so a bad graph is rejected at submit rather than dying part-way through a denoise.
- Immutable takes - regenerating adds a take; nothing is ever overwritten. The take history is the point.
- Durable runs - a run survives a restart, and progress streams over a WebSocket.
- Graph decoupled from GPU work - the graph is the unit of caching; a batched sampler is the unit of batching, grouping compatible jobs across requests.
- A single device policy owns all placement - device, dtype, offload, and attention, so the same graph runs on a 4090, a 6 GB laptop, pure CPU, or split across several GPUs without touching the graph.
- Bring your own models, no hidden downloads - a drop-in
models/layout feeds a typed catalog and versioned node descriptors; nothing is fetched behind your back.
Krea 2 is a 12.9B single-stream MMDiT, released as two checkpoints that work together: RAW is the undistilled base you fine-tune, Turbo is an 8-step distilled checkpoint you generate with. A LoRA trained on RAW applies to Turbo unchanged, which is the workflow both nodes are built around.
Both nodes read the ComfyUI-style files from Comfy-Org/Krea-2:
core/models/
  diffusion_models/  krea2_turbo_bf16.safetensors   <- for the Krea 2 Turbo node
                     krea2_raw_bf16.safetensors     <- for the Krea 2 RAW node (and training)
  text_encoders/     qwen3vl_4b_bf16.safetensors
  vae/               qwen_image_vae_diffusers.safetensors
  loras/             krea2_retroanime.safetensors   <- the official style LoRAs, optional
Two things are worth knowing before you download 26 GB twice:
- Only the
bf16builds load. Thefp8_scaled,int8_convrot,mxfp8andnvfp4files in that repo carry ComfyUI-specific scale tensors that only ComfyUI can read, and the node says so rather than failing deep in a load. Memory saving is the device policy's job instead. - The VAE is the diffusers-format one, fetched from
Qwen/Qwen-Image. ComfyUI'sqwen_image_vae.safetensorsholds the same weights in a different module layout that diffusers cannot read. The node's model popup downloads the right file for you.
Nothing here needs a Hugging Face token: every repo involved is public, and Krea's own gated repos are never touched.
FLUX.2 from Black Forest Labs is the first family here that is natively multi-reference: reference images ride in the denoiser's token sequence, so "the character from image 1 wearing the jacket from image 2" is a first-class capability rather than a workaround.
One node, FLUX.2, covers the whole family. Pick a checkpoint in the node's Adjust sidebar and it identifies itself: klein 4B, klein 9B, either Base build, the KV variant, or dev. Steps and guidance default to "from model", so switching a distilled checkpoint for its Base build moves 4 steps at guidance 1.0 to 50 at guidance 4.0 without touching a setting.
- Reference images - wire one image to edit it, or several to compose from them. The node numbers them on its face, and the prompt addresses them by position. There is no denoise-strength slider because FLUX.2 has no img2img: a single reference is the edit.
- klein 4B is Apache 2.0 and the recommended starting point. It renders 1024px in four steps. At bf16 it is 16.1 GB of weights peaking around 17.9 GB, so a 24 GB card holds it resident; on a 16 GB card the fit ladder drops it to int8 or fp16 and it still runs. Its text encoder is the same Qwen3-4B file Z-Image already uses, so if you have run Z-Image you have most of it.
- dev is 32B. The fp8 build the model popup offers wants around 32 GB. Bring a prequantized NF4 folder yourself and it fits a 24 GB card instead, because the prompt is encoded first and the text encoder freed before the transformer loads.
Files come from the ungated ComfyUI repacks. The model popup fetches klein 4B, its text encoder and the VAE in one click, and offers the rest of the family as optional extras:
core/models/
  diffusion_models/  flux-2-klein-4b.safetensors                      <- the default, Apache 2.0
                     flux-2-klein-base-4b.safetensors                 <- the base build, for LoRA training
                     flux-2-klein-9b-int8-ConvRot-comfyui.safetensors <- klein 9B, int8, ~12 GB
                     flux2_dev_fp8mixed.safetensors                   <- dev, fp8, ~32 GB
  text_encoders/     qwen_3_4b.safetensors                            <- the 4B builds, shared with Z-Image
                     qwen_3_8b.safetensors                            <- klein 9B
                     mistral_3_small_flux2_fp8.safetensors            <- dev
  vae/               flux2-vae.safetensors
Each klein size needs its own text encoder, and dev uses Mistral-3 rather than Qwen3.
For dev on a 24 GB card, take the ungated diffusers/FLUX.2-dev-bnb-4bit instead: an 18.1 GB NF4 transformer beside a 15.4 GB NF4 encoder, far cheaper than the fp8 single file. Clone it into diffusion_models/ as a folder. The popup does not fetch it, and a diffusers folder is a valid checkpoint anywhere a single file is.
Worth knowing:
- Prompts are prose, not tags. FLUX.2 wants natural language, and keyword stuffing works against it. Word order carries weight.
- Only the Base klein checkpoints take a negative prompt. The distilled builds run no classifier-free guidance and dev is guidance-distilled, so a negative prompt is logged and ignored there rather than silently pretending to apply.
- dev and every 9B build are non-commercial. klein 4B, its Base build, and the VAE are Apache 2.0.
MiniMax H3 is the first video model in Inline Core, and the first model here that generates a soundtrack rather than a silent clip. One transformer denoises the video and its 32 kHz stereo audio in a single pass, so a take is one MP4 with sound in it, ready to drop straight into the timeline.
Four nodes, because the inputs genuinely differ and a node should say what it takes:
- Text → Video for a shot from nothing but a prompt.
- Image → Video to bring a still you already like into motion.
- First and Last Frame to pin the opening frame, the closing frame, or both, and let the model fill in between.
- Reference → Video for consistency across shots. Wire up to nine images, three video clips and three audio clips, and address them by position in the prompt. Wiring order is the numbering you see on the node.
Output is 24 fps between 5 and 15 seconds at a 768 pixel short edge. Duration snaps to the frame grid the video decoder works in, so asking for 14.9 seconds renders 14.4 rather than failing. There is no guidance slider and no negative prompt, because the released checkpoints are guidance-distilled and neither exists.
core/models/
  diffusion_models/  minimax_h3_fl2va_bf16.safetensors   <- text, image, and first/last frame
                     minimax_h3_ref2va_bf16.safetensors  <- the reference node
  text_encoders/     MiniMax-H3-text-encoder/            <- Qwen3-VL-32B, a folder
                     MiniMax-H3-processor/               <- tokenizer and processor
  vae/               minimax_h3_video_vae_fp16.safetensors
                     minimax_h3_audio_vae_fp32.safetensors
Worth knowing before you start a download this size:
- This is a big model. 144 GB for the first three nodes, 210 GB with the reference node. A 33B transformer runs beside a 32B conditioner, but not at the same time: the prompt is encoded first, the conditioner then steps off the card, and the denoiser takes it for the whole denoise. Two things make that fit. The modulation weights, 40% of the transformer, are factorised at load and take it from 66.3 GB to 40.3 GB. The video VAE stays resident when the card has room, rather than streaming leaf by leaf. Measured on a 45 GB card: a 10 second clip at 960x544 takes about 7.2 minutes, peaking at 38.9 GB VRAM and 46.7 GB of system RAM that cannot be reclaimed, so plan on 64 GB of RAM. Smaller cards stream more and are slower. If that is out of reach, the same model is available as an API node with no setup at all.
- Canvas is the biggest speed lever. 960x544 renders about 2.3x faster per step than the trained 1344x768, and the difference is far larger than any other setting.
- Only the bf16 builds load. The
int8_convrotandprunedfiles carry scale tensors and a reworked modulation branch that only ComfyUI reads, the same story as the Krea 2 files above. The node's model picker lists them with the reason rather than hiding them, so a wasted download at least explains itself. Memory saving is the device policy's job here. - LoRAs work. Every H3 node has a LoRA input, and adapters are fused into each block as it streams, before the factorisation and the quantisation. You can train one in the Trainer tab: see LoRA training. An H3 LoRA is trained on stills and applies to video, so it carries look and style rather than motion.
Steer a local render with a pose, depth, or edge map. Wire a control map into a gen node's Control input and pick a ControlNet in the node's Adjust sidebar.
- Control Space - a 3D pose editor in a node. Pose one or more characters, frame a camera, and render the scene as an OpenPose skeleton or a depth map. No reference photo needed.
- Apply ControlNet - turn any image into a control map (OpenPose, Depth-Anything V2, MiDaS depth, or Canny edges). Detector weights download once on first use.
- Z-Image Turbo - full ControlNet via the Fun Union model. Use the distilled
-2602-8stepsbuild; the plain one is blurry at 8 steps. - Krea 2 - depth control via the
Patil/Krea-2-depth-controlnetcontrol-LoRA. - FLUX.2 - two routes. On any variant, a control map wired into Control is used as a reference image, which steers loosely and costs nothing extra. On dev, pick the
alibaba-pai/FLUX.2-dev-Fun-Controlnet-Unionmodel for tight structural adherence: one union model covering canny, depth, pose, HED, MLSD, scribble and gray, with no mode to select. It needs real headroom, rendering at 512px on a 24 GB card. - Control strength - dial how hard the map is followed, per node.
Drop ControlNet files into core/models/controlnet/, or use the node's model popup to download them.
Install community-built nodes straight from a GitHub repo, from the Extensions dialog or a repo URL.
- One-click install, with a live stepper showing download, security review, dependency resolution, and activation.
- Every install is reviewed. Code that could replace Inline's PyTorch, hide a payload, or run at install time is blocked outright; subprocesses, sockets, and unknown network hosts need your explicit approval.
- Extensions can't break your setup. Their dependencies install into their own folder and can never touch the shared torch/diffusers runtime, and genuine conflicts fail at install with both versions named.
- Nodes appear on the canvas immediately, with their own params, model downloads, take history, and Run control. No restart, and no frontend code from the author.
- Toggle any node on or off, roll back to a previous version, or uninstall, and see when an update is available.
- Publish by tagging. Authors list once in the registry; after that a new tag reaches users with no further PR.
Browse the extension registry, or copy the extension guide to build your own: four working nodes, declared model downloads, and a full authoring reference.
Multi-GPU: split one image across GPUs
Got two or more GPUs? Inline Core can cut a single image's latency by running its denoise loop (the expensive, iterative sampling step) collectively across them. This is not "one image per GPU" (independent renders); it's one image whose sampling is shared by all the GPUs, so a single render finishes faster.
It's done with xDiT (xfuser), which parallelizes diffusion-transformer inference in an isolated worker group (one process per GPU via torchrun, over local IPC). The HTTP server, database, and graph stay single-process; only the denoise distributes, and it sits behind a sampler seam so single-GPU/CPU runs pay no overhead. The split method is chosen from the interconnect Core detects: PipeFusion (default, works over plain PCIe) or Ulysses (sequence-parallel attention, used when NVLink is present). Turn it on with ./webui.sh --multi-gpu after uv pip install -e ".[parallel]".
For the full engineering story (the graph/sampler/device-policy design, the node vocabularies, and the xDiT worker group), see core/README.md and core/CLAUDE.md.
API Nodes bring hosted, closed models onto the same canvas: no GPU, no setup, instant creative range. Add a Generate node, pick a model, and bring your own provider key (it stays on your machine); you pay the provider per render, and each node estimates the price before you run.
The initial provider is fal, with models across image, video, and audio: FLUX.2, FLUX.2 Edit, GPT Image 2, Nano Banana, Seedance, MiniMax H3, LTX, Sonilo, and many more. Add your fal.ai key in Settings to use them. More providers will follow behind the same API Node surface.
However you render, the frame keeps its full, non-destructive take history, so you can mix API Nodes and local generation in the same film without ever losing a good version.
H3 (Hailuo 03) is on the canvas as three API nodes, all at 2K, 5 to 15 seconds. The open weights also run locally on the Inline Core engine, as four nodes with no per-render cost if you have the hardware for them.
- Text → Video for a shot from nothing but a prompt.
- Image → Video for a still you already like. It has two image dots: wire a start frame on its own, or add an end frame and H3 interpolates between the two.
- Reference → Video for consistency across shots. Wire up to nine images, plus reference video and audio, and address them by position in the prompt: "Image 1 is the lead, Image 2 is her dog". Wiring order is the numbering you see on the node.
Video costs $0.26 per second at 2K, so the node's price badge reads about $1.30 for a five second clip. Reference images past the first five and any reference video cost extra on top of that.
Yes. Inline Studio is free and open source under the GPL-3.0 license. There's no paid tier to use the app.
Only for local generation. The built-in Inline Core engine renders on the GPU of whatever machine runs it (you can also run it on a remote GPU box and open the UI from your laptop). Hosted fal models need no GPU at all, and the canvas + planning work with no GPU either.
Yes, that is what the Trainer tab is for, and it runs entirely on your own GPU with no cloud step. It trains LoRAs for Z-Image, Krea 2, FLUX.2, and MiniMax H3. Training is cheaper than generating: FLUX.2 klein Base trains at 512px in about 8.6GB, Z-Image in about 13GB, and Krea 2 with a 4-bit base in about 12GB, so a 16GB card handles all three. See Benchmark results for the measured table.
See Two ways to generate: Z-Image, Krea 2, FLUX.2, or MiniMax H3 locally on your own GPU, or hosted fal models. You can train a LoRA locally for any of the four as well, see LoRA training. Adding a new local model is a Core change (a model runner), no UI release.
Inline Studio is early and moving fast, any issues, ideas, and pull requests are all welcome. Start with CONTRIBUTING.md for setup, the checks to run, and how to open a PR. CLAUDE.md is the deeper engineering guide: the architecture, the data model, and the conventions to follow. By taking part you agree to our Code of Conduct.
Want to help by using it for real? Try the creator task: build a short 20-second AI film in Inline Studio and send us your feedback.
Inline Core's multi-GPU denoise builds on xDiT's PipeFusion and Ulysses parallelism.
The LoRA trainer's approach to training on a step-distilled model follows ai-toolkit by ostris, and the Turbo modes use his training adapters for Z-Image and Krea 2.
Krea 2 support follows the reference implementations in diffusers (Krea2Pipeline and the Krea 2 DreamBooth LoRA example). Krea 2 is released by Krea AI under the Krea AI Community License; the weights are the user's to obtain and use under that license.
FLUX.2 is released by Black Forest Labs. klein 4B, its Base build, and the VAE are Apache 2.0; dev and the 9B builds carry non-commercial terms. The weights are the user's to obtain and use under those.
MiniMax H3 is released by MiniMax under the MiniMax H3 Community License; the weights are the user's to obtain and use under that. Support is built on the diffusers integration from its MiniMax-H3 pull request, vendored with provenance until it lands upstream.
Are you an AI filmmaker who wants to help us make this better? We run a paid trial feedback program: use Inline Studio on real work, tell us what helps and what gets in your way, and get paid for your time.
Come say hi on our Discord and reach out, we'll get you set up.
Copyright (C) 2026 Inline Studio. Licensed under the GNU General Public License v3.0: you may use, study, share and modify it, and any work you distribute that builds on it must also be GPL-3.0.
The models you run carry their own licenses, which the GPL does not change: Krea 2 is under the Krea AI Community License, Z-Image under Tongyi's terms, and FLUX.2 is split - klein 4B, its Base build, and the VAE are Apache 2.0, while dev and every 9B build are non-commercial. You bring your own weights and use them under those.