- 🤖 Introduction
- ⚙️ Tech Stack
- 🤸 Quick Start
- 🔧 CI/CD Pipeline
- 🔍 Monitoring
This repository is part of a collection of three repositories that follow GitOps principles to deploy a Zoom clone application to an AWS EKS cluster. The application was originally created by Adrian Hajdin.
The other repositories in this collection are:
This repository includes the Dockerfile and Jenkinsfile, which are used to containerize the application and set up the CI/CD pipeline.
- Next.js
- TypeScript
- Clerk
- getstream
- shadcn
- Tailwind CSS
- Docker
- Jenkins
- Splunk
Follow these steps to set up the project locally on your machine.
Prerequisites
Make sure you have the following installed on your machine:
Cloning the Repository
git clone <repo-url>
cd <repo-url>
Installation
Install the project dependencies using npm:
npm installSet Up Environment Variables
Create a new file named .env in the root of your project and add the following content:
NEXT_PUBLIC_CLERK_PUBLISHABLE_KEY=
CLERK_SECRET_KEY=

NEXT_PUBLIC_CLERK_SIGN_IN_URL=/sign-in
NEXT_PUBLIC_CLERK_SIGN_UP_URL=/sign-up

NEXT_PUBLIC_STREAM_API_KEY=
STREAM_SECRET_KEY=
Replace the placeholder values with your actual Clerk & getstream credentials. You can obtain these credentials by signing up on the Clerk website and getstream website
Running the Project
npm run devOpen http://localhost:3000 in your browser to view the project.
Prerequisites
Make sure you have Docker installed on your machine. You can download and install Docker from the official
Set Up Environment Variables
Create a new file named .env in the root of your project and add the same content as mentioned above.
Building the Docker Image
docker build -t <image-name> .Replace <image-name> with a name of your choice for the Docker image.
Running the Docker Container
docker run -p 3000:3000 <image-name>This command will start the app, making it accessible at http://localhost:3000 in your browser.
Jenkins is used with a declarative approach to establish the CI/CD pipeline for the application.
Prerequisites
- An AWS account
- Make sure you created the infrastructer in Infrastructure as Code (IaC) repository
Jenkins And Dependencies Installation
- Login to the Jenkins EC2 machine.
- Run the following command to update the package list:
sudo apt update- Install JDK:
sudo apt install openjdk-21-jdk-
Install Jenkins: Follow the instructions in the Jenkins installation guide.
-
Install Docker: Follow the instructions in the Docker installation guide.
-
Add Jenkins to the Docker group:
sudo usermod -aG docker jenkins- Install Trivy: Follow the instructions in the Trivy installation guide.
Jenkins Set Up
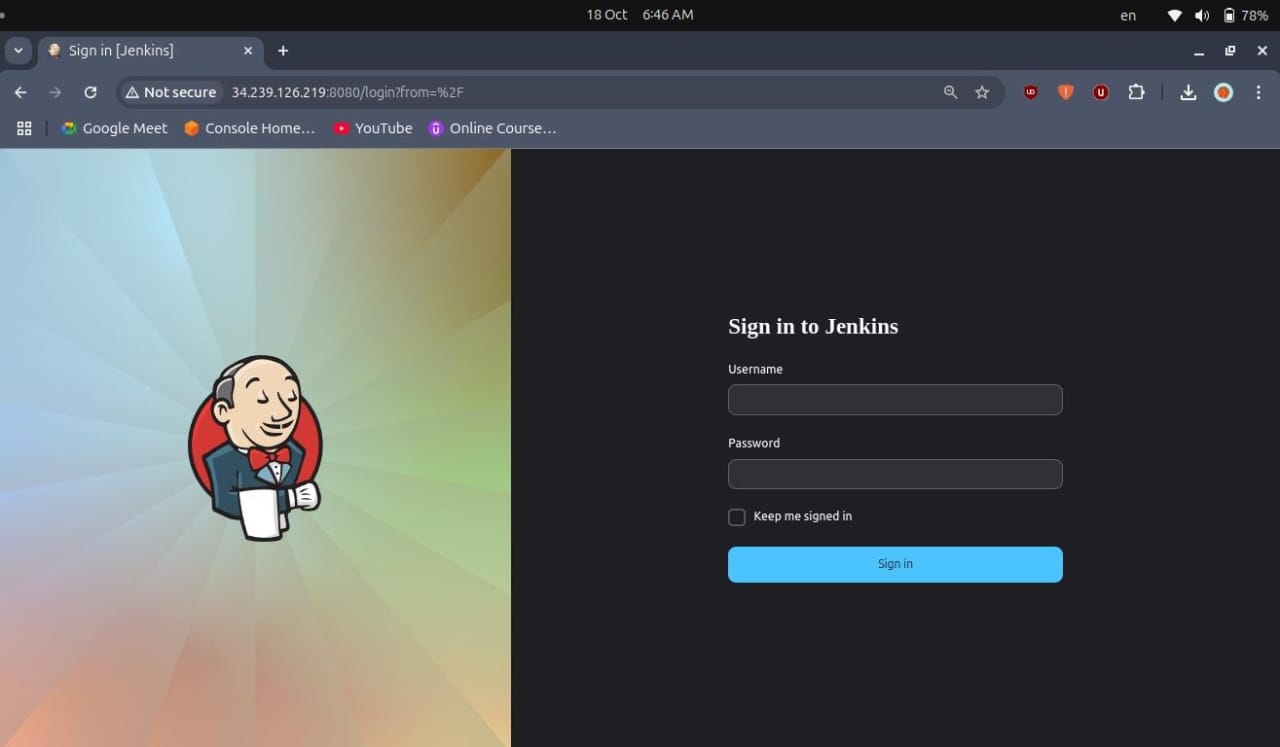
- Once jenkins and the other dependencies are installed you access it on http://<ec2-public-ip>:8080
Replace <ec2-public-ip> with the public ip of jenkins ec2 machine.
- To get the admin password run:
sudo cat /var/lib/jenkins/secrets/initialAdminPassword- Install the suggested plugins
Additional Plugins Used For The Pipeline
- SonarQube Scanner for Jenkins
- OWASP Dependency-Check Plugin
- Docker
- Docker Pipeline
- Docker API Plugin
- Docker Commons Plugin
- Pipeline: Stage View Plugin
- NodeJS Plugin
- Splunk Plugin
Pipeline Stages
-
Create Or Update .env File
Checks for the existence of the.envfile; if not present, it creates one from a credentialed secret file. If it exists, it updates it if the content has changed. -
Sonar Cloud Analysis
Runs SonarQube analysis on the project using the specified configuration to ensure code quality and detect issues. -
Install Dependencies For Check
Installs the necessary Node.js dependencies required for running the OWASP Dependency-Check analysis. -
Running Dependency Check
Executes OWASP Dependency-Check to analyze the project for vulnerabilities and publishes the report. -
Running Trivy Analysis
Performs a security scan of the filesystem using Trivy and saves the output to a file. -
Building Docker Image
Builds a Docker image for the application using the specified Docker registry and tags it with the build number. -
Running Trivy On Docker
Runs a Trivy scan on the newly built Docker image to identify any vulnerabilities. -
Uploading To DockerHub
Pushes the built Docker image to Docker Hub using the specified credentials. -
CleanUp
Cleans up the Docker environment by pruning unused Docker objects and removingnode_modules. -
Pushing Image Version To K8s Repo
Clones the Kubernetes repository, updates the image tag in the deployment file with the current build number, and pushes the changes back to GitHub.
Note: Make sure to change the environment values and crediential ids in the pipeline to yours
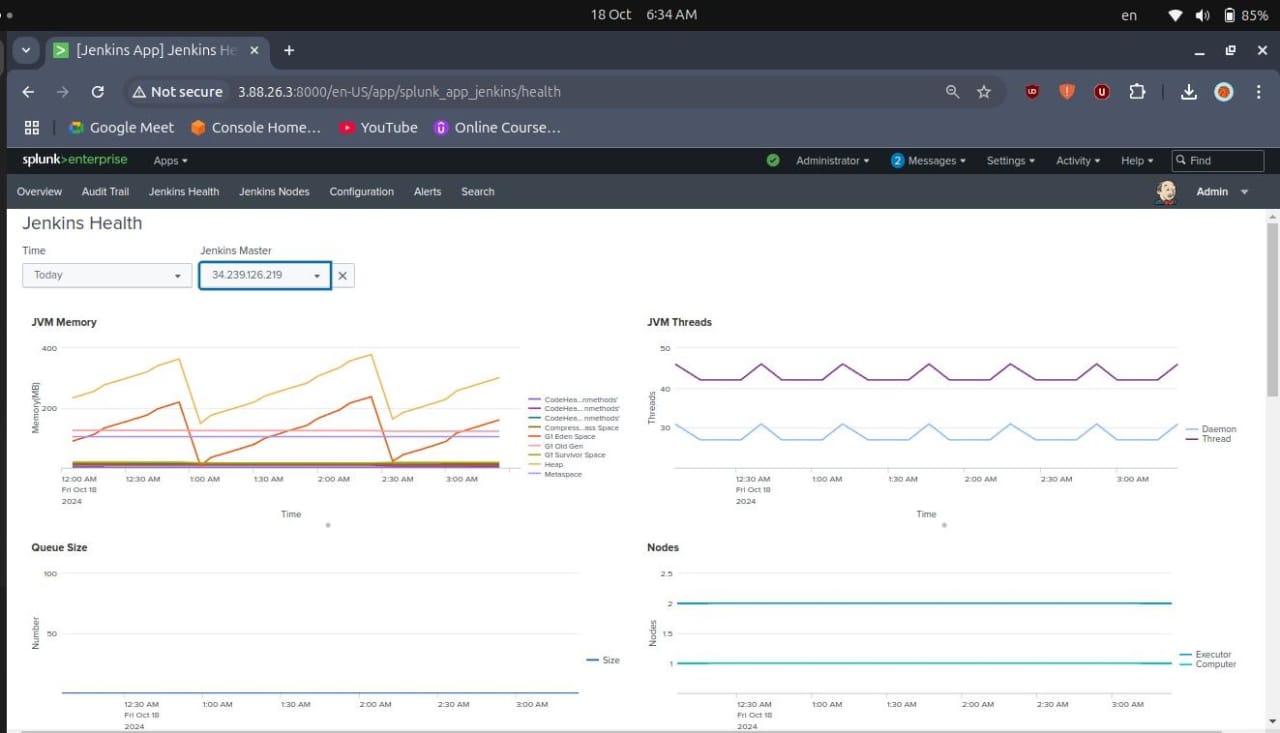
Splunk is utilized to monitor the Jenkins server.
Prerequisites
- An AWS account
- Make sure you created the infrastructer in Infrastructure as Code (IaC) repository
- Splunk account
Splunk Installation
- Connect to your ec2 machine.
- Download Splunk using the wget command:
wget -O splunk-9.1.1-64e843ea36b1-linux-2.6-amd64.deb "https://download.splunk.com/products/splunk/releases/9.1.1/linux/splunk-9.1.1-64e843ea36b1-linux-2.6-amd64.deb" - Install Splunk:
sudo dpkg -i splunk-9.1.1-64e843ea36b1-linux-2.6-amd64.deb
- Enable Splunk to start on boot:
sudo /opt/splunk/bin/splunk enable boot-start - Start Splunk:
sudo /opt/splunk/bin/splunk start
- Once the installation is complete, you can access it at http://<ec2-public-ip>:8000.
Replace
<ec2-public-ip>with the public ip of splunk ec2 machine.
Intergate Splunk With Jenkins
-
In Splunk Dashboard, click on Apps → Find more apps.
-
Search for Jenkins in the search bar.
-
Click on the Splunk app for Jenkins and install it.
-
Provide your Splunk Account credentials.
-
Click on Agree and install.
-
Click on Go home.
-
Verify that Jenkins has been added on the homepage of Splunk.
-
Go to Settings > Data Inputs in the Splunk web interface.
-
Click on HTTP Event Collector.
-
Click on Global Settings.
-
Set All tokens to enabled.
-
Uncheck SSL enable.
-
Use 8088 port and click on Save.
-
Click on New token.
-
Provide a name and click Next.
-
Click on Review.
-
Click on Submit.
-
Click on Start searching.
-
Copy your token and keep it safe.
-
Go to Settings > Data Inputs in the Splunk web interface.
-
Click on the HTTP Event Collector.
-
Copy your token again and keep it safe.
-
Go to the Jenkins dashboard.
-
Click on Manage Jenkins → Plugins → Available plugins.
-
Search for Splunk and install it.
-
Click on Manage Jenkins → System.
-
Enable HTTP input host as SPLUNK PUBLIC IP.
-
Input the HTTP token that you generated in Splunk.
-
Add Jenkins IP and apply.
-
In the Jenkins dashboard under Splunk, click on Test connection.
-
Restart your Splunk machine:
-
Restart Jenkins and log in again using:
-
Go to Splunk and click on the Jenkins app to view monitoring output.