1. Initial Setup
This page is up to date to the latest version.
Previous versions
| Plugin Version | Supported Unreal Versions |
|---|---|
| 1.6.x | 5.1-5.3 |
| 1.5.x | 5.1-5.2 |
| 1.4.x | 5.0-5.1 |
| 1.2.x | 4.26-5.0 |
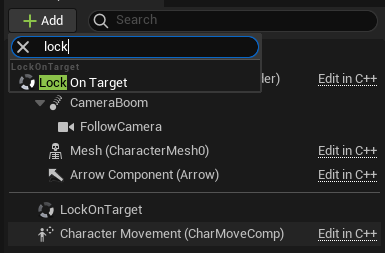
- Add LockOnTargetComponent to your character.
- Set
TargetHandlerImplementationto WeightedTargetHandler.

- Input Setup.
Detailed Input Overview.
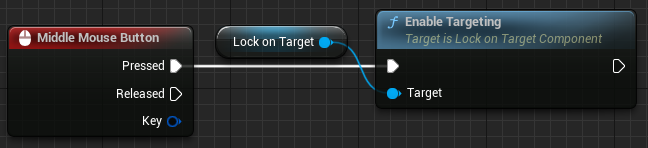
- Target finding and clearing:
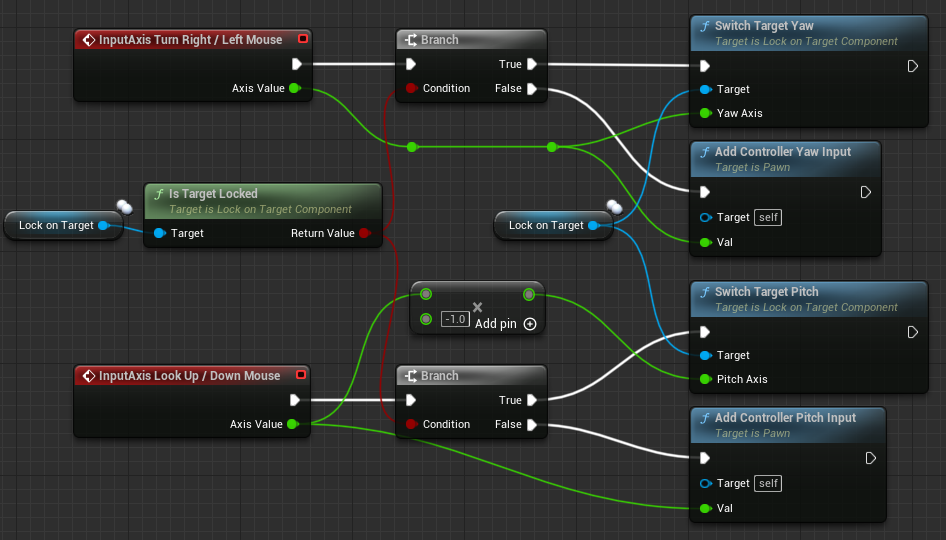
- Target switching with an axis input:
LockOnTargetComponent is just a storage for the captured Target, additional features are implemented inside Extensions, even Target finding.
To add a particular Extension, you should add it to the Default Extensions property.

By default, LockOnTarget uses Controller rotation to orient the camera to the Target.
- Add ControllerRotationExtension.

- Make sure to enable
UsePawnControlRotationin SpringArmComponent.

- To enable camera location lag, activate
EnableCameraLagin SpringArmComponent.

- (Optional) If you want to smoothly apply camera zoom, you can add CameraModifierExtension.

- To visually indicate the Target, add WidgetExtension.


LockOnTarget doesn't provide any strafing animations.
- To orient the character to face the Target, add PawnRotationExtension.

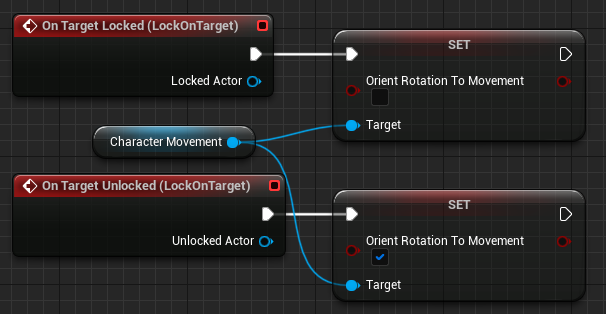
- If you're using
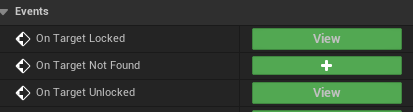
bOrientRotationToMovementin CharacterMovementComponent, add OnTargetLocked/Unlocked events from LockOnTargetComponent and disable it.

- Add TargetComponent to the desired AActor.

- Select the mesh in
AssociatedComponentName, which is used for Socket lookup, attachment, etc. If None then the root component will be used.

- Select the desired sockets in
Sockets.
At least one socket should be specified.

- (Optional) If you want to preview a potential Target, you can add TargetPreviewExtension.

Warning Be sure to read this before packaging your project.